Gilded Club, Syracuse NY, Tactics On Tap, Wednesday September 21st 2022, 7:30 PM, Curt Isakson, JJ Casetta, Mike Ciampo, Sam Hittle, Matt Rush, Larry McCormack

"TACTICS ON TAP" SYRACUSE NEW YORK, WEDNESDAY SEPT 21ST @ 7:30 PM

The Tactics on Tap venue will be located at the Gilded Club, a short 0.3 mile walk from the Marriott Syracuse Downtown. Throughout the event a we encourage attendees to contribute to a college fund for the children of Fallen Pittsburgh Firefighter James Ellis. Chief Curt Isakson will also raffle off Conference Passes to Future County Fire Tactics Events.

Take The Door Training is hosting their annual Heavy Rescue Conference, September 19-23, 2022, in Syracuse New York.

This conference will feature three eight hour Hands On Training (HOT)  sessions entitled Rescue Company Operations on the Fireground. Chief Isakson will be instructing in this HOT Session with J.J. Cassetta, Larry McCormack, Sam Hittle, Matt Rush, and others.

Chief Isakson's H.O.T. Session

HOT Session | Rescue Company Operations on the Fireground
HOT Session | Rescue Company Operations on the Fireground September 21st, 22nd, or 23rd, 2022 | 8:00 am – 4:00 pm Whether you are tasked with Truck Company Functions, RIT Operations, or Fire Ground Support, there are a number of important tasks that need to be completed in an efficient and effective manner. This class will cover a few of these vital tasks related to entry, search and rescue, and ground ladders. Students will rotate through several skills stations with plenty of hands-on opportunity, learning street proven forcible entry techniques, aggressive primary search and VES skills, and working with ground ladders.

Presenter Spotlight

Curt “Ike” Isakson is a 30+ year veteran of the fire service, with experience working in volunteer, career, and combination departments in urban, suburban, rural, and countywide settings.

He is currently a Battalion Chief for Escambia County Fire Rescue in Pensacola Florida where he has worked for the last 21 years.

conference Pricing

$ 750
00
Full Conference & HOT
  • 195.00 - Two Day Lecture
  • 675.00 - Three Day HOT
  • Multiple Lecture & HOT
    Options Available

CONFERENCE VENUE

The conference venue will be located at the Marriott Syracuse Downtown.

CONFERENCE LODGING

The Marriott Syracuse Downtown has discounted rooms starting at $149.00 a night.

AIR TRAVEL

If you are traveling to the area by air,  Syracuse Hancock International Airport is approximately nine (9) miles north of the conference venue.

'24-'25 PENSACOLA BEACH

COMMAND OFFICER
BOOT CAMP 2024
APR 30 - MAY 2, 2024
LEARN MORE
WATER ON THE FIRE CONFERENCE 2024
AUGUST 27 - 29, 2024
LEARN MORE
BATTALION CHIEF
BOOT CAMP
OCTOBER 2024 👉 SOLD OUT
LEARN MORE
PENSACOLA BEACH
FIRE CONFERENCE 2024
DECEMBER 10 -12, 2024
FEATURING THE HIGH RISE OPERATIONS CLASS (HROC)
LEARN MORE
BATTALION CHIEF
BOOT CAMP
FEBRUARY 2-8, 2025
LEARN MORE
Previous slide
Next slide

2024 CHIEF IKE NEAR YOU

FDIC 2024
INDIANAPOLIS, IN
APRIL 15-20, 2024
LEARN MORE

CFT CONFERENCE VIDEO

🚨BOX ALARM🚨

Sign up now to be in the know about everything we have going on at County Fire Tactics.

Add yourself onto our Box Alarm, and you will receive exclusive first release notifications to your e-mail about conferences, seminars, discounts, podcasts, training articles, and more.

CF Tactics Box Alarm Updates

Receive CF Tactics Box Alarm Updates, Enter your E-Mail

CONTACT CF TACTICS

View a list of CF Tactics programs Chief Isakson can deliver at your next conference, seminar, symposium, or in house event. Utilize the links provided to reach Curt and Jessica for more information about booking Chief Isakson or our Pensacola Beach conference series. 

Home

Home

Home

Home

Home

Special Operations Training Ideas

When dealing in fire department Special Operations, we must constantly be thinking outside the box when it comes to new innovative training ideas that push our boundaries and keep our heads where they need to be. It is tough sometimes to come up with new ideas that will stimulate and challenge our members. Below are a couple of easy drills that you can do at your firehouse that will keep your guys on their toes and get them thinking.
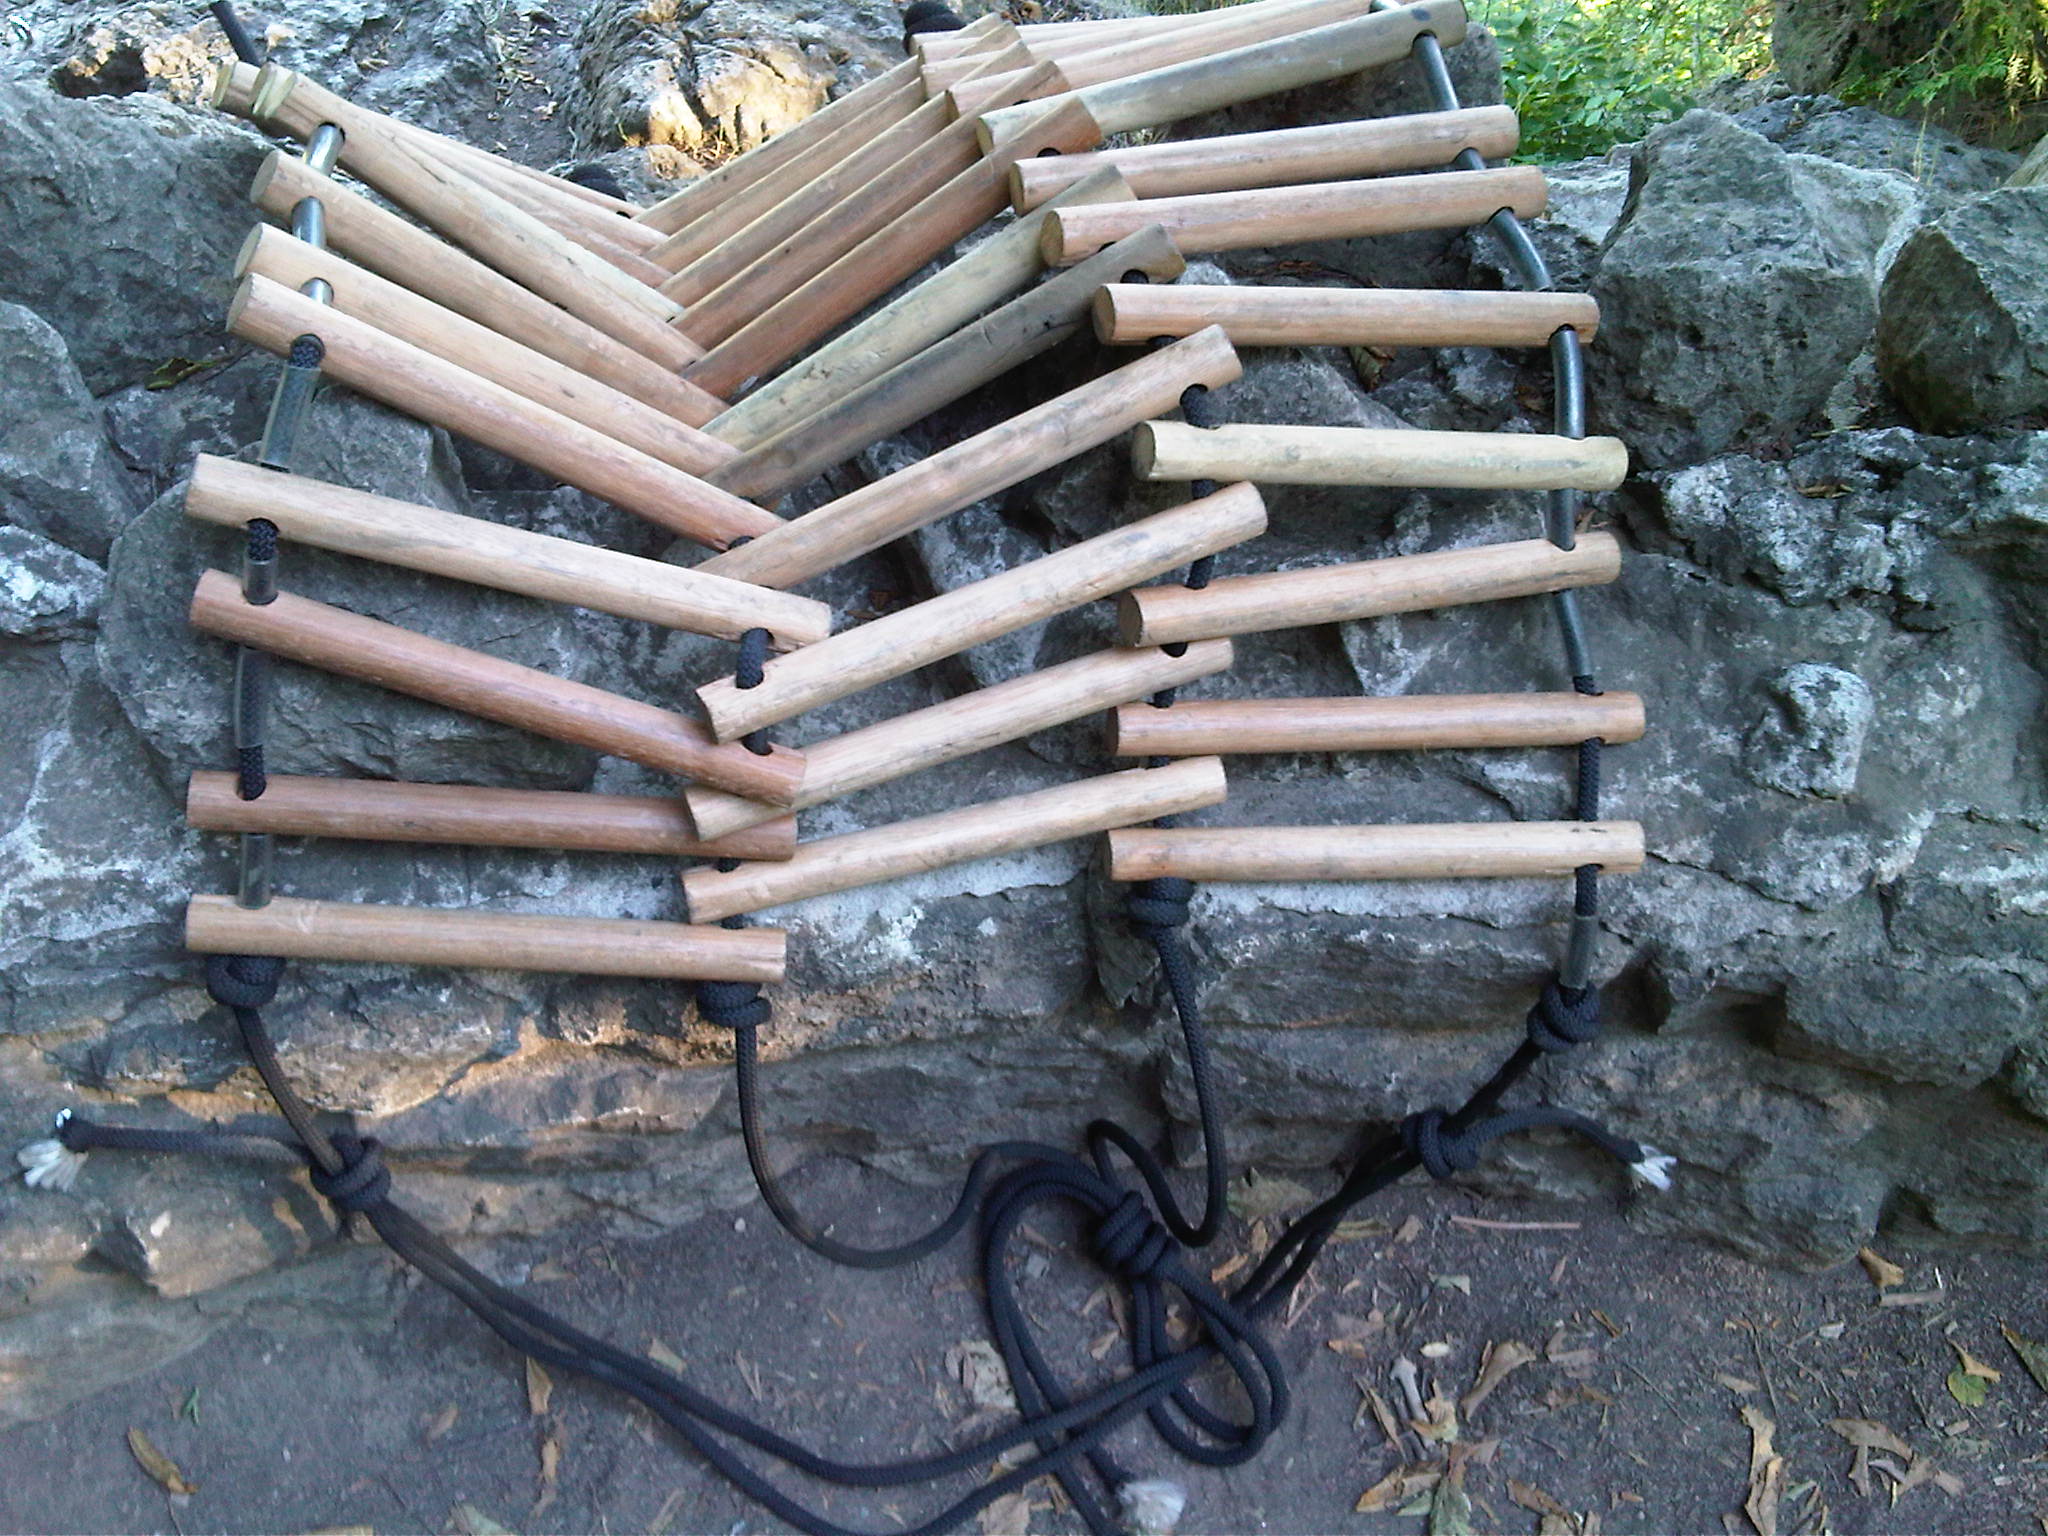
Impalement on Rope

miltonrope5

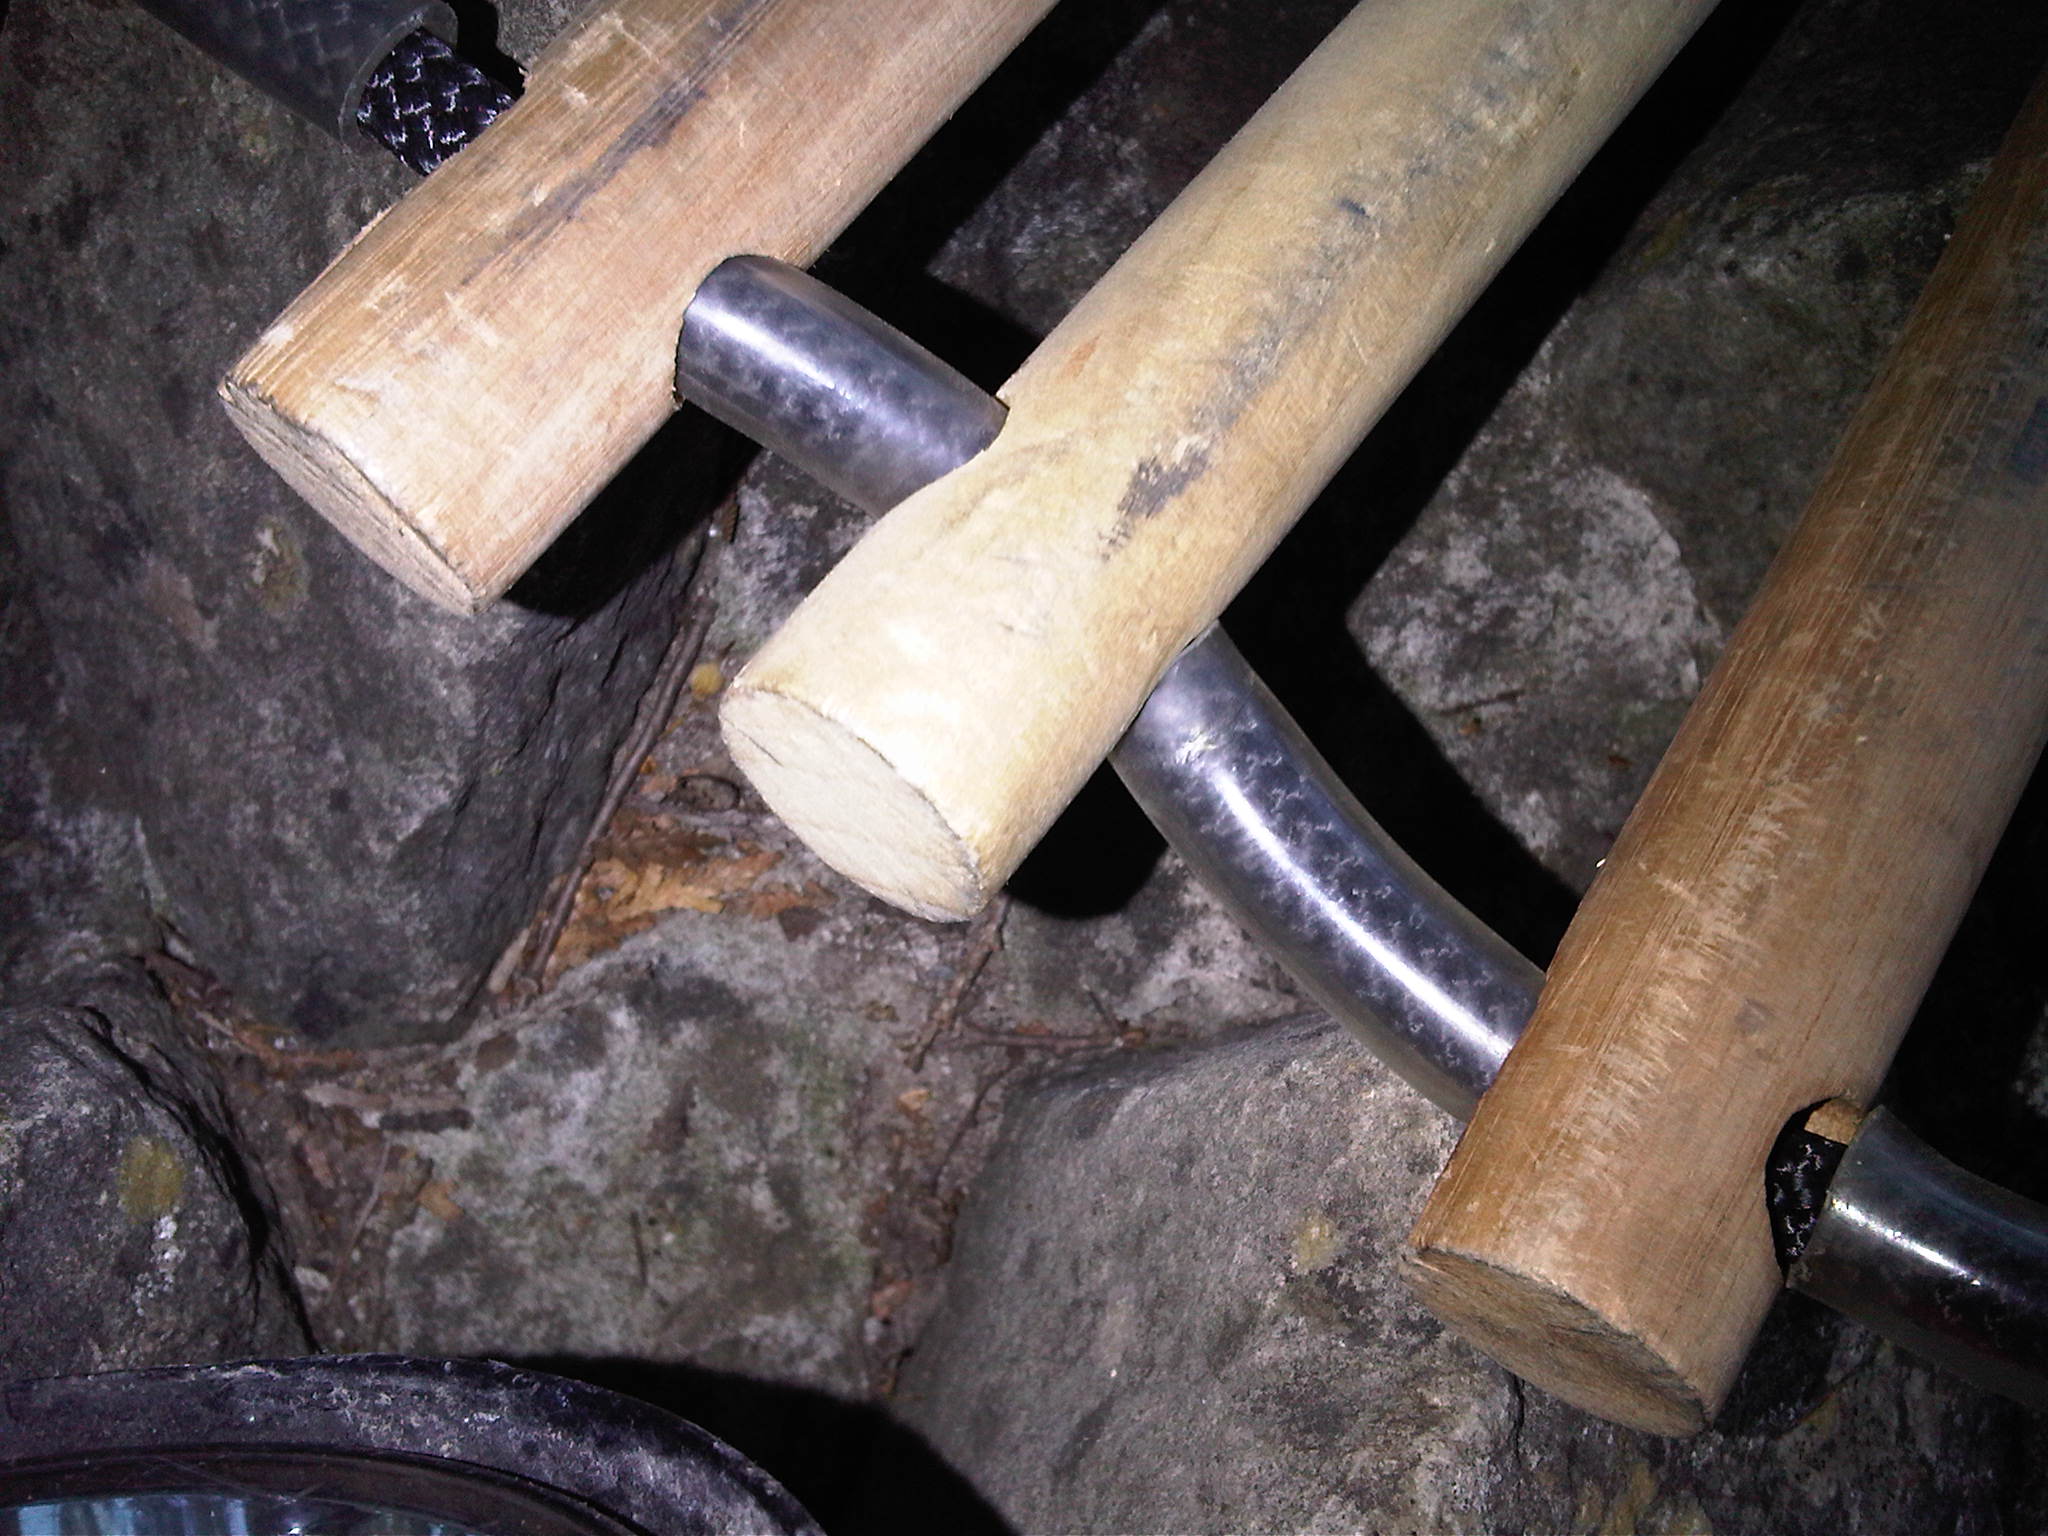
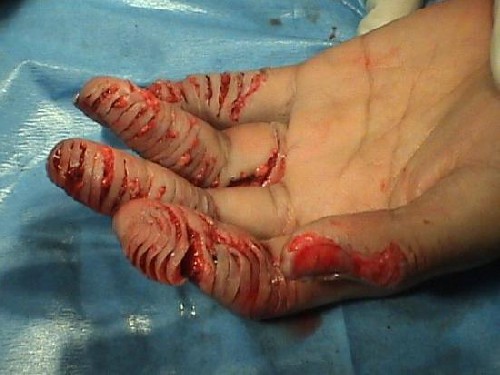
An ironworker slips and falls impaling himself 6 stories up….. the only way to access him…. rope rescue.

Nothing like ramping up a drill you have done 1000 times! Standard pick off’s can sometimes become a “going through the motions” drill for good crews, it is important to constantly push your members to the next level on the training ground…. an easy way to do that with pick off’s is to add new elements to it. Adding new elements/challenges will push your members out of their comfort zone and push their capabilities to the next level.

miltonrope4

An impalement on rope is a great way to push it to the next level. Some issues that you can come across while doing this are:

  • Will the Rescue Diaper/Yates Harness/LSP fit on the patient with the impalement in the way? A good chance to get away from using that “one way” that we always do!
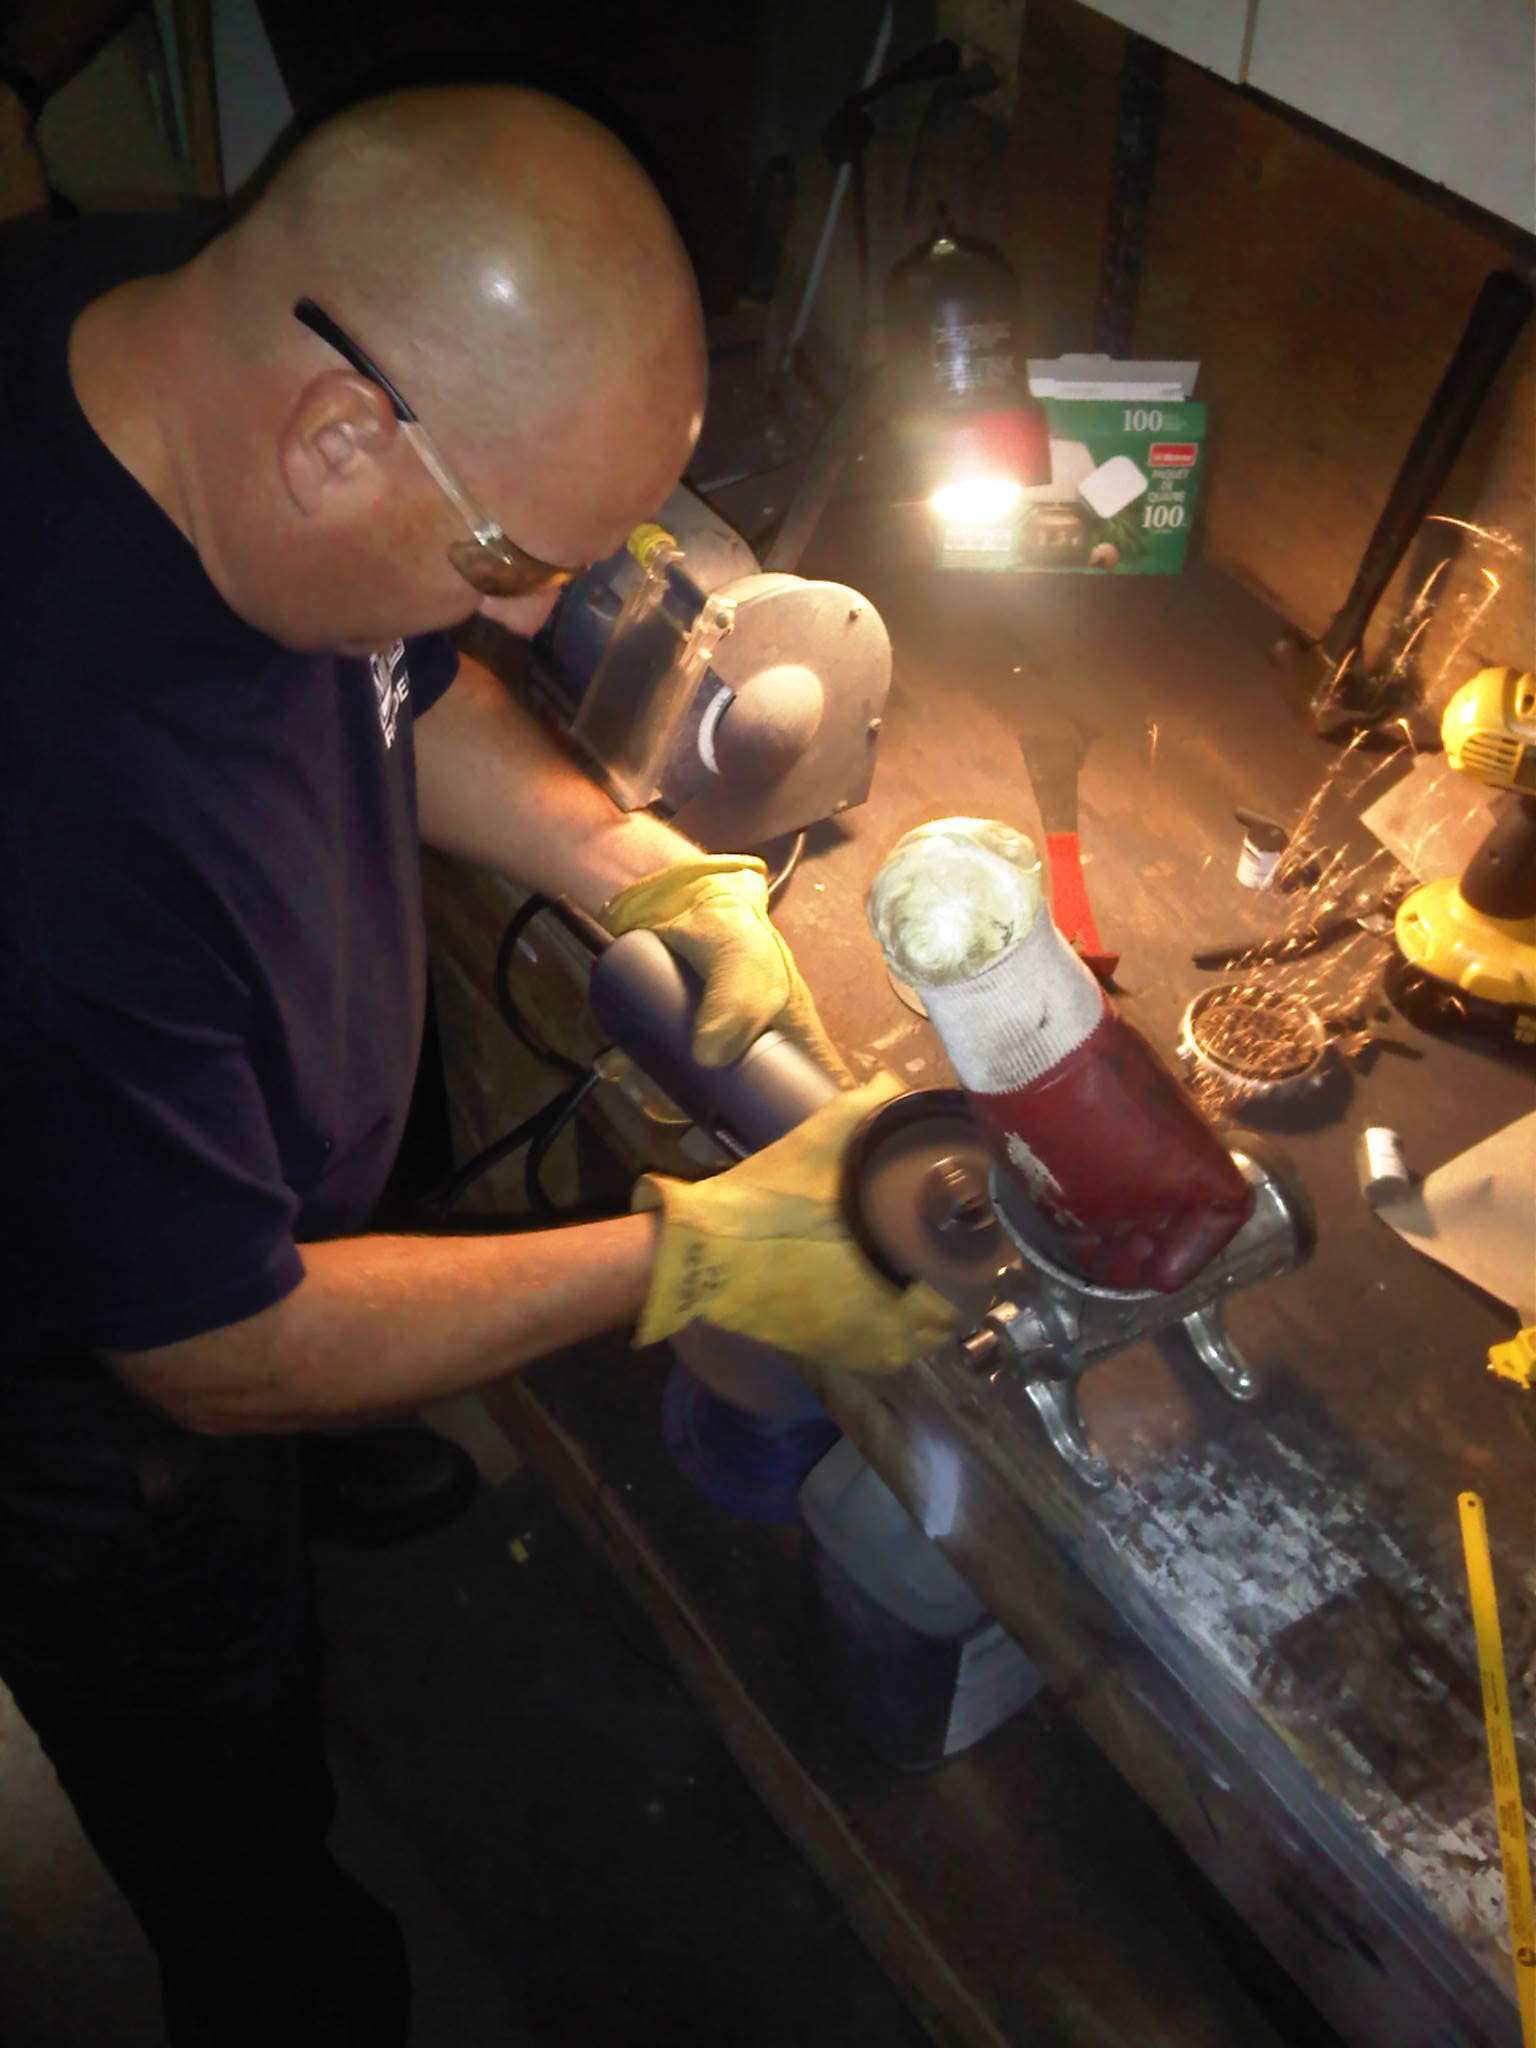
  • What cutting tool are you going to use?
  • How are you gonna get tools to the rescuer?
  • How are you gonna handle blade or battery changes?

This drill can be done with several different types of metals that will require different cutting tools to be used.

miltonrope3


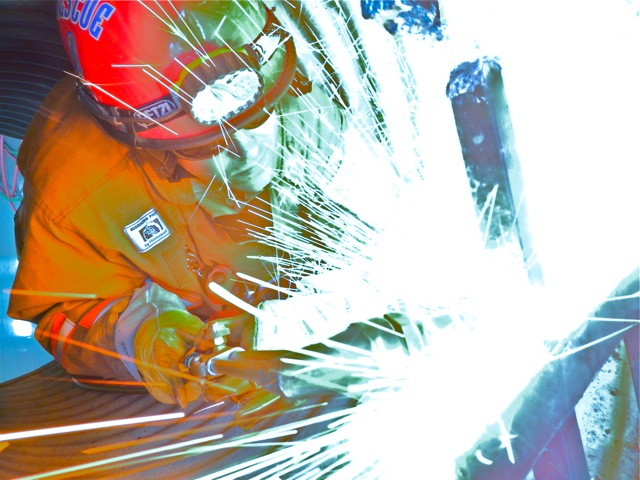
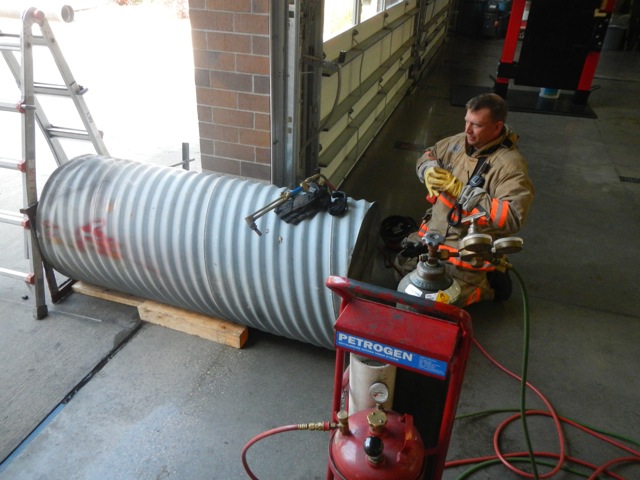
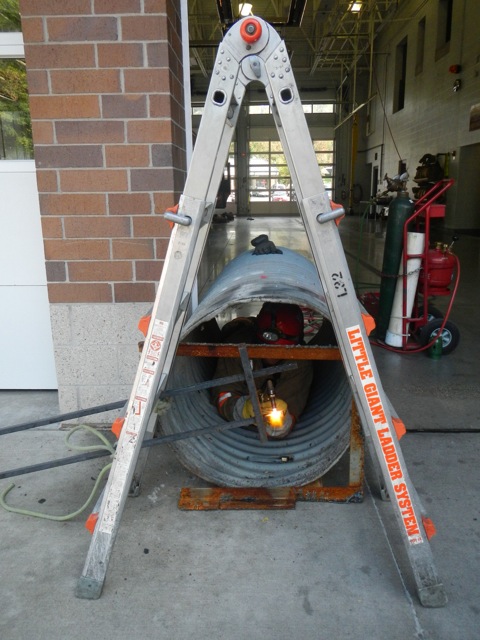
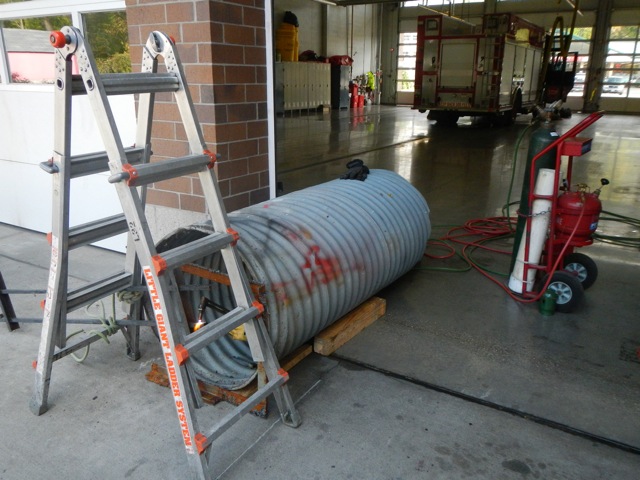
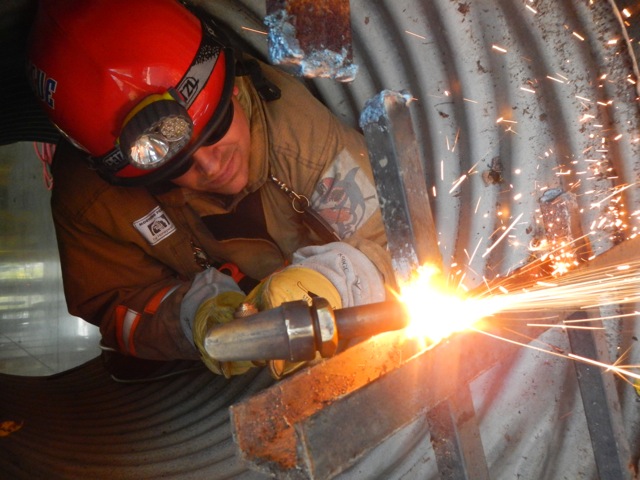
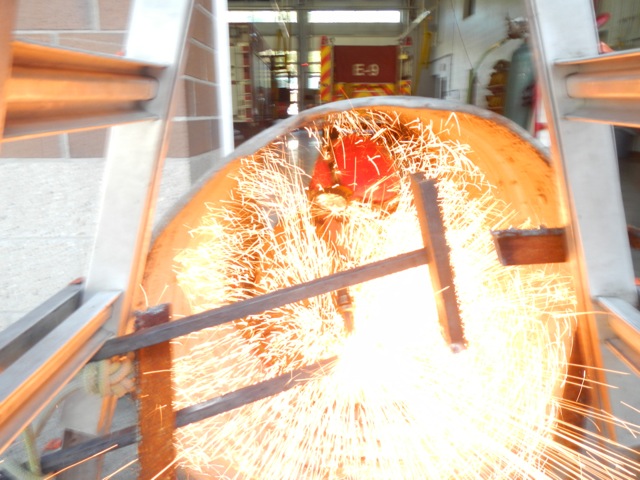
Confined Space Cutting and Tool Usage

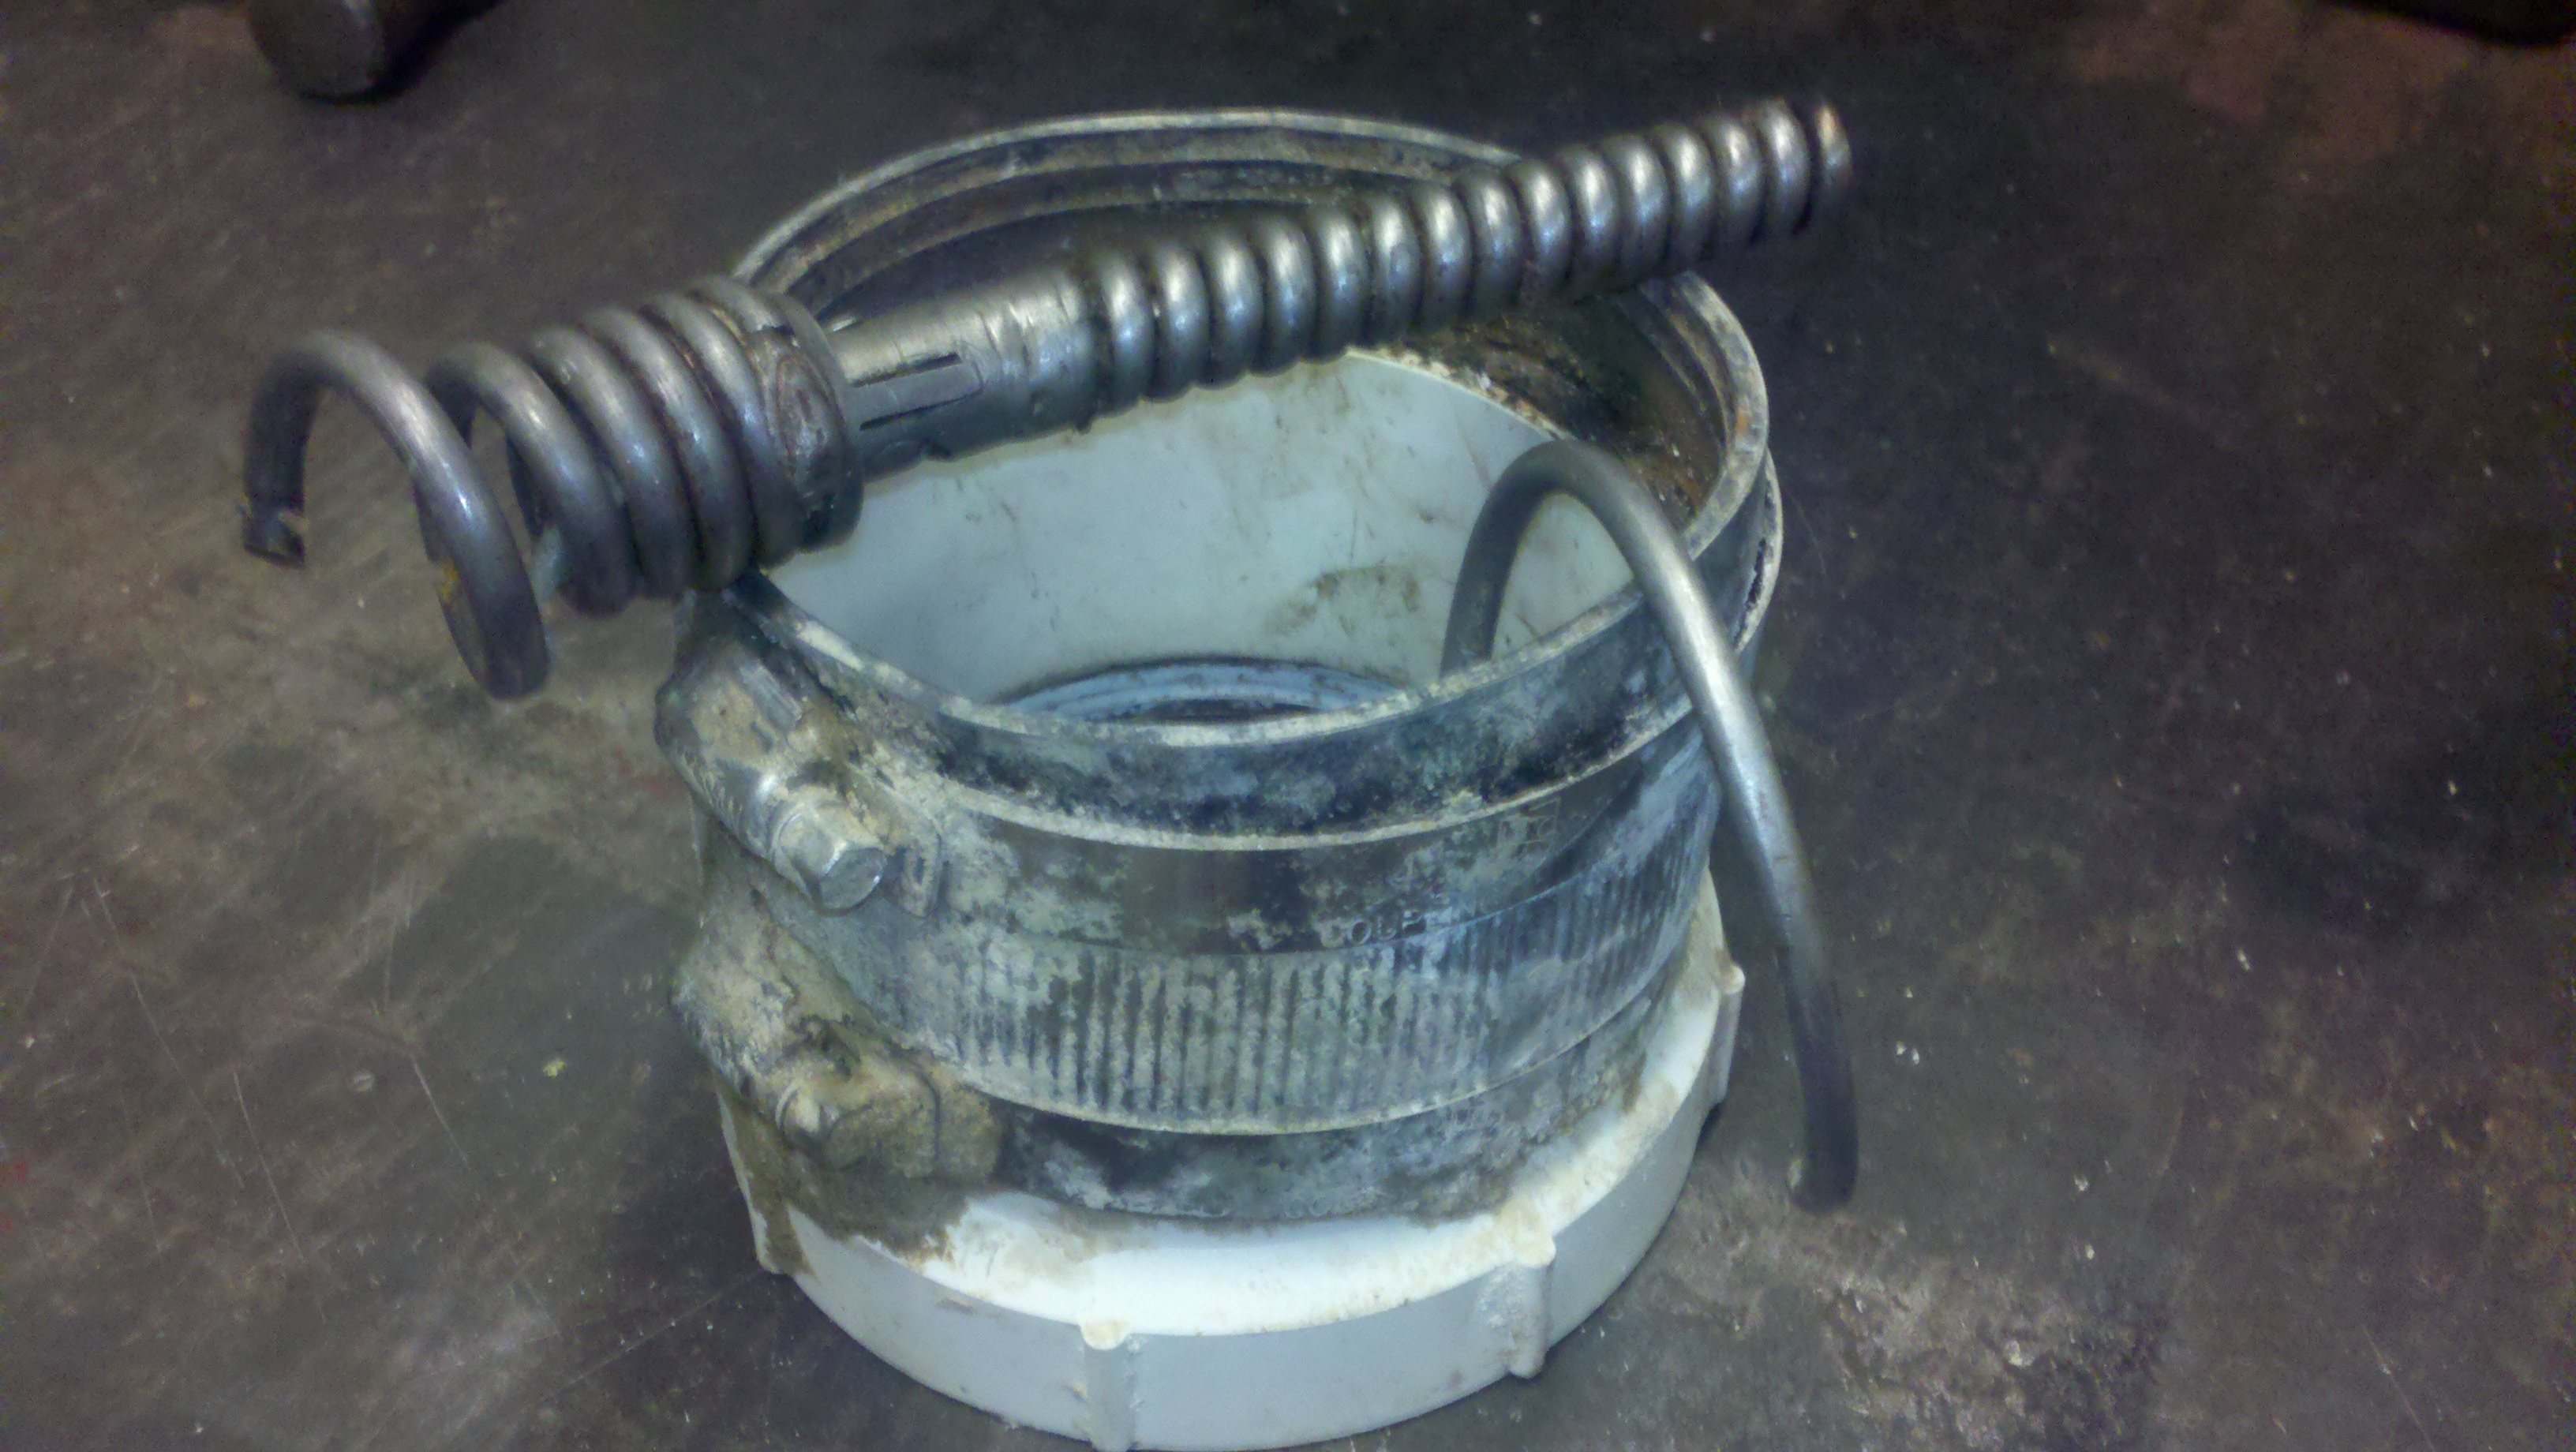
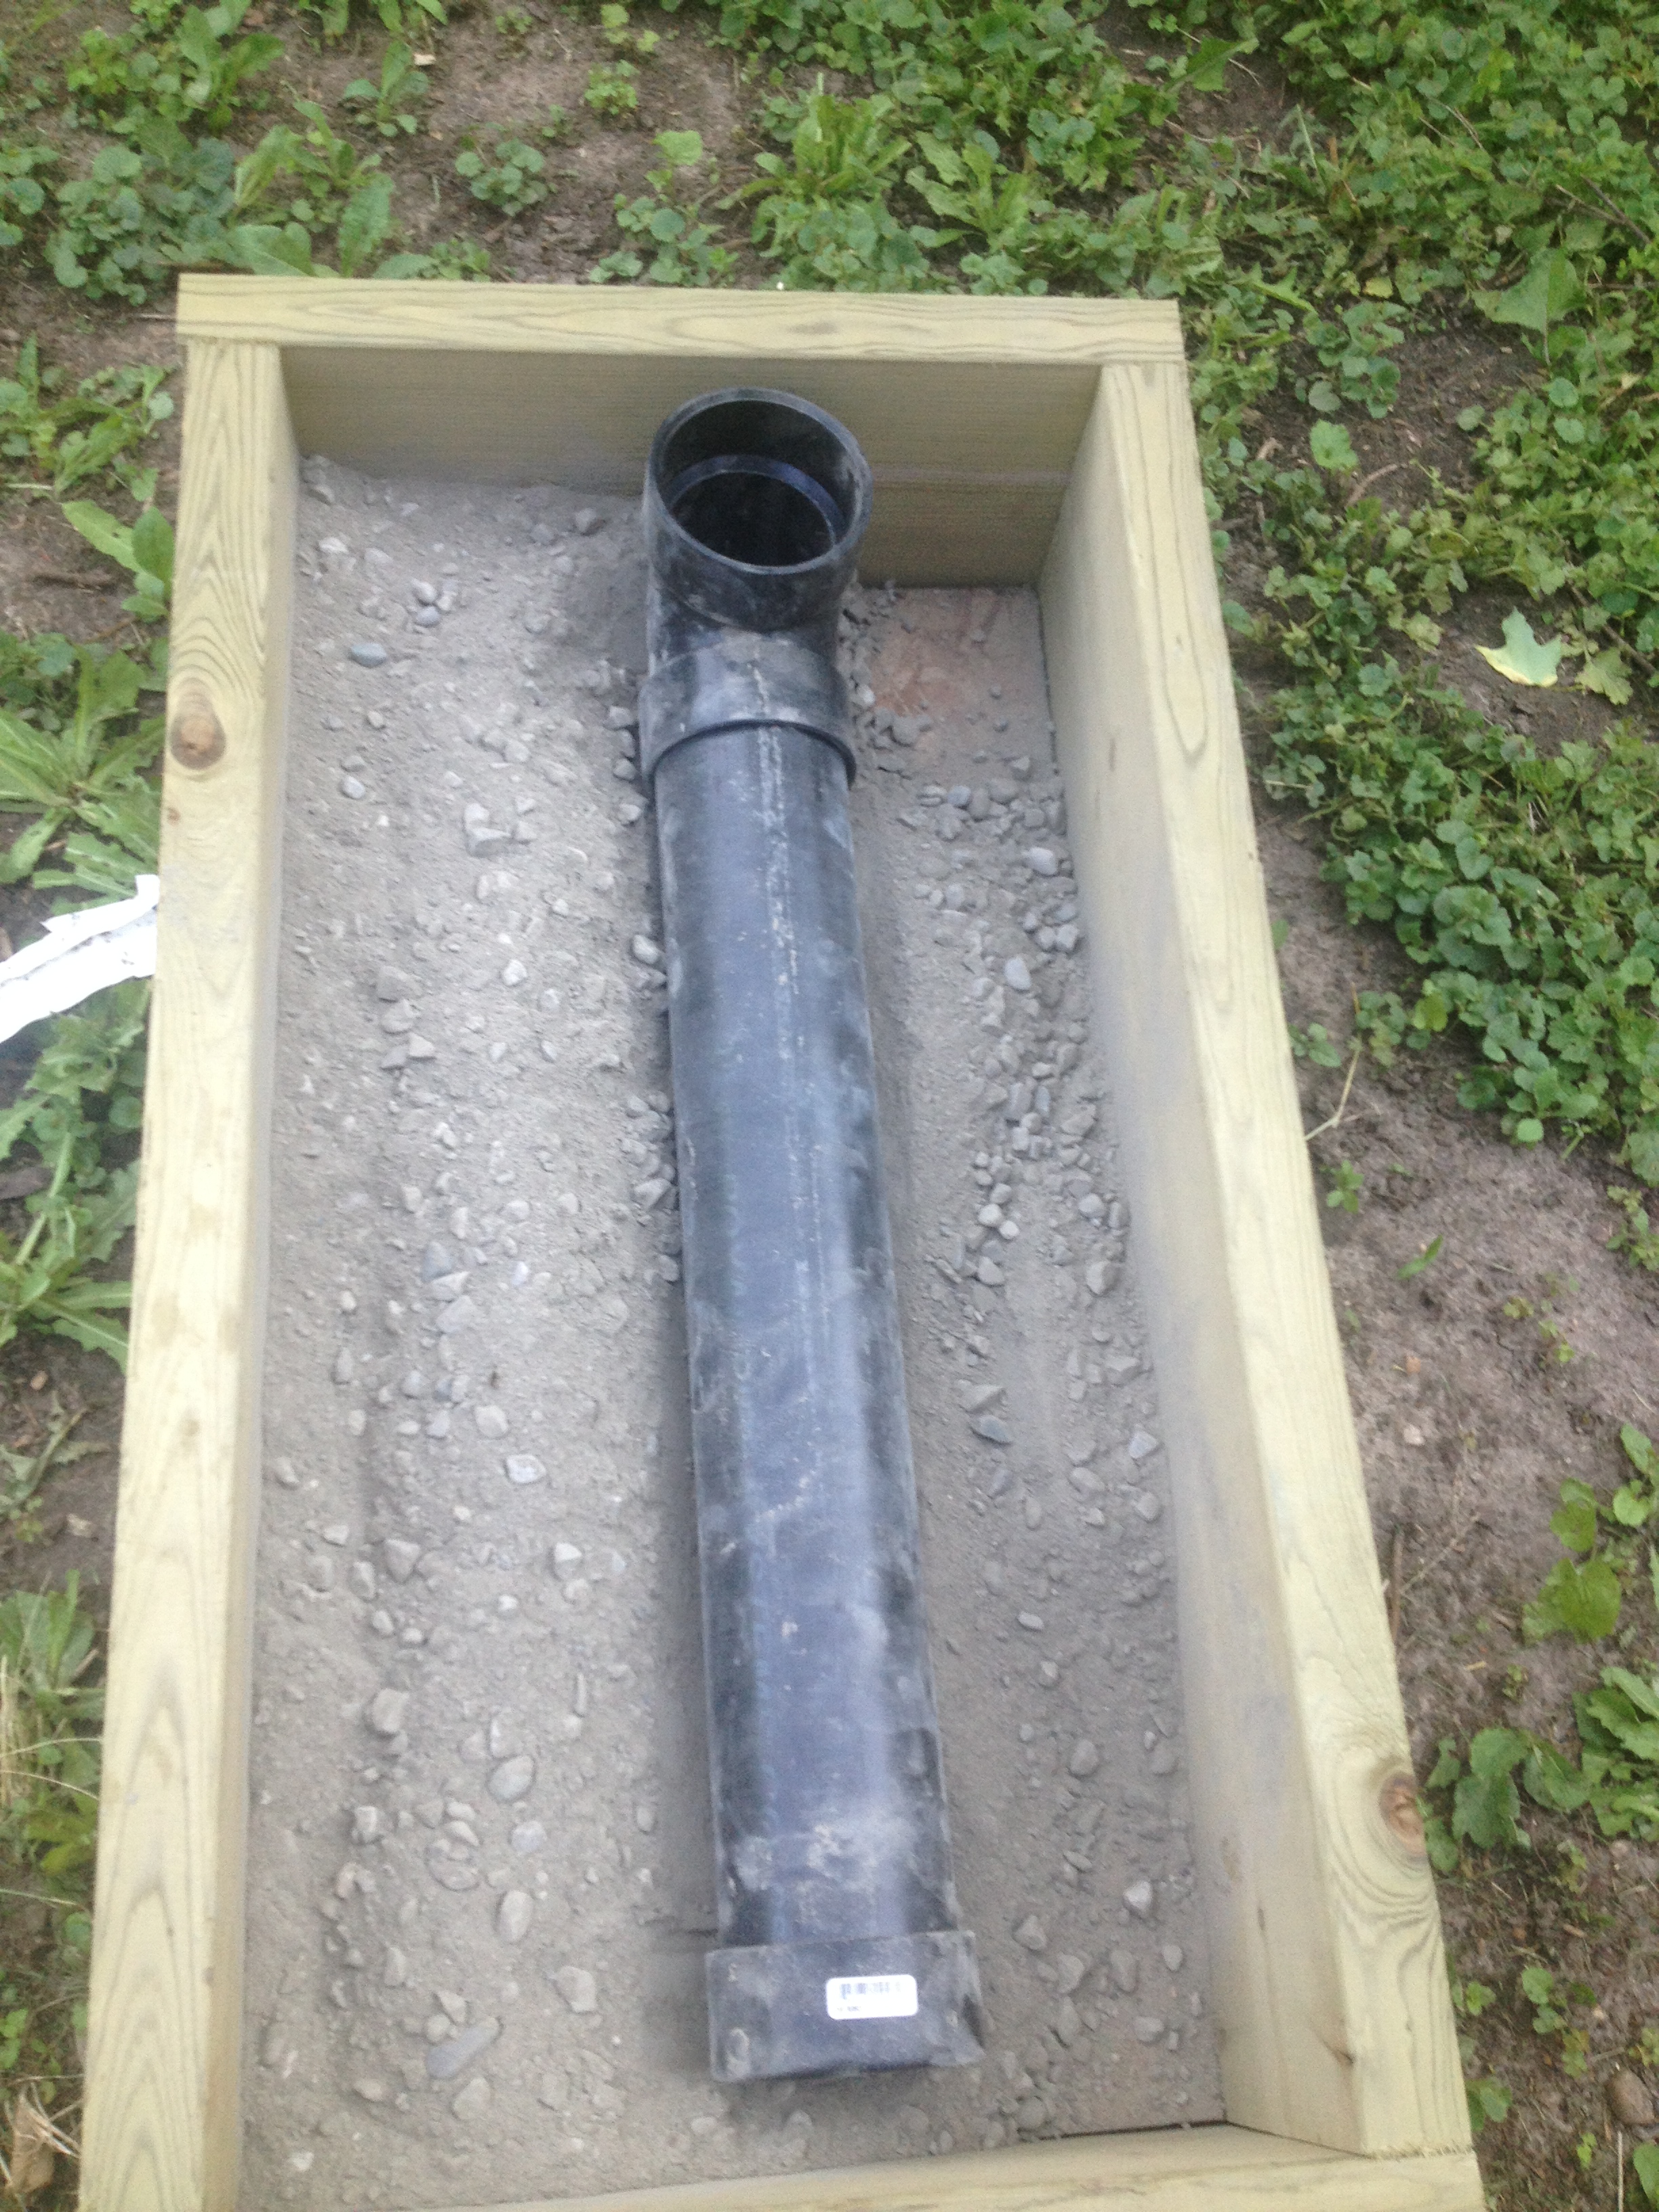
This one was passed along by Lt. Grant Light from Cincinnati Heavy Rescue 9.

When talking about machine rescue or collapse rescue we are forced to use tools and equipment in tough and awkward positions, this drill is all about teaching members to use our cutting tools in these awkward positions in spaces where it is tough to see and move.

fridge1

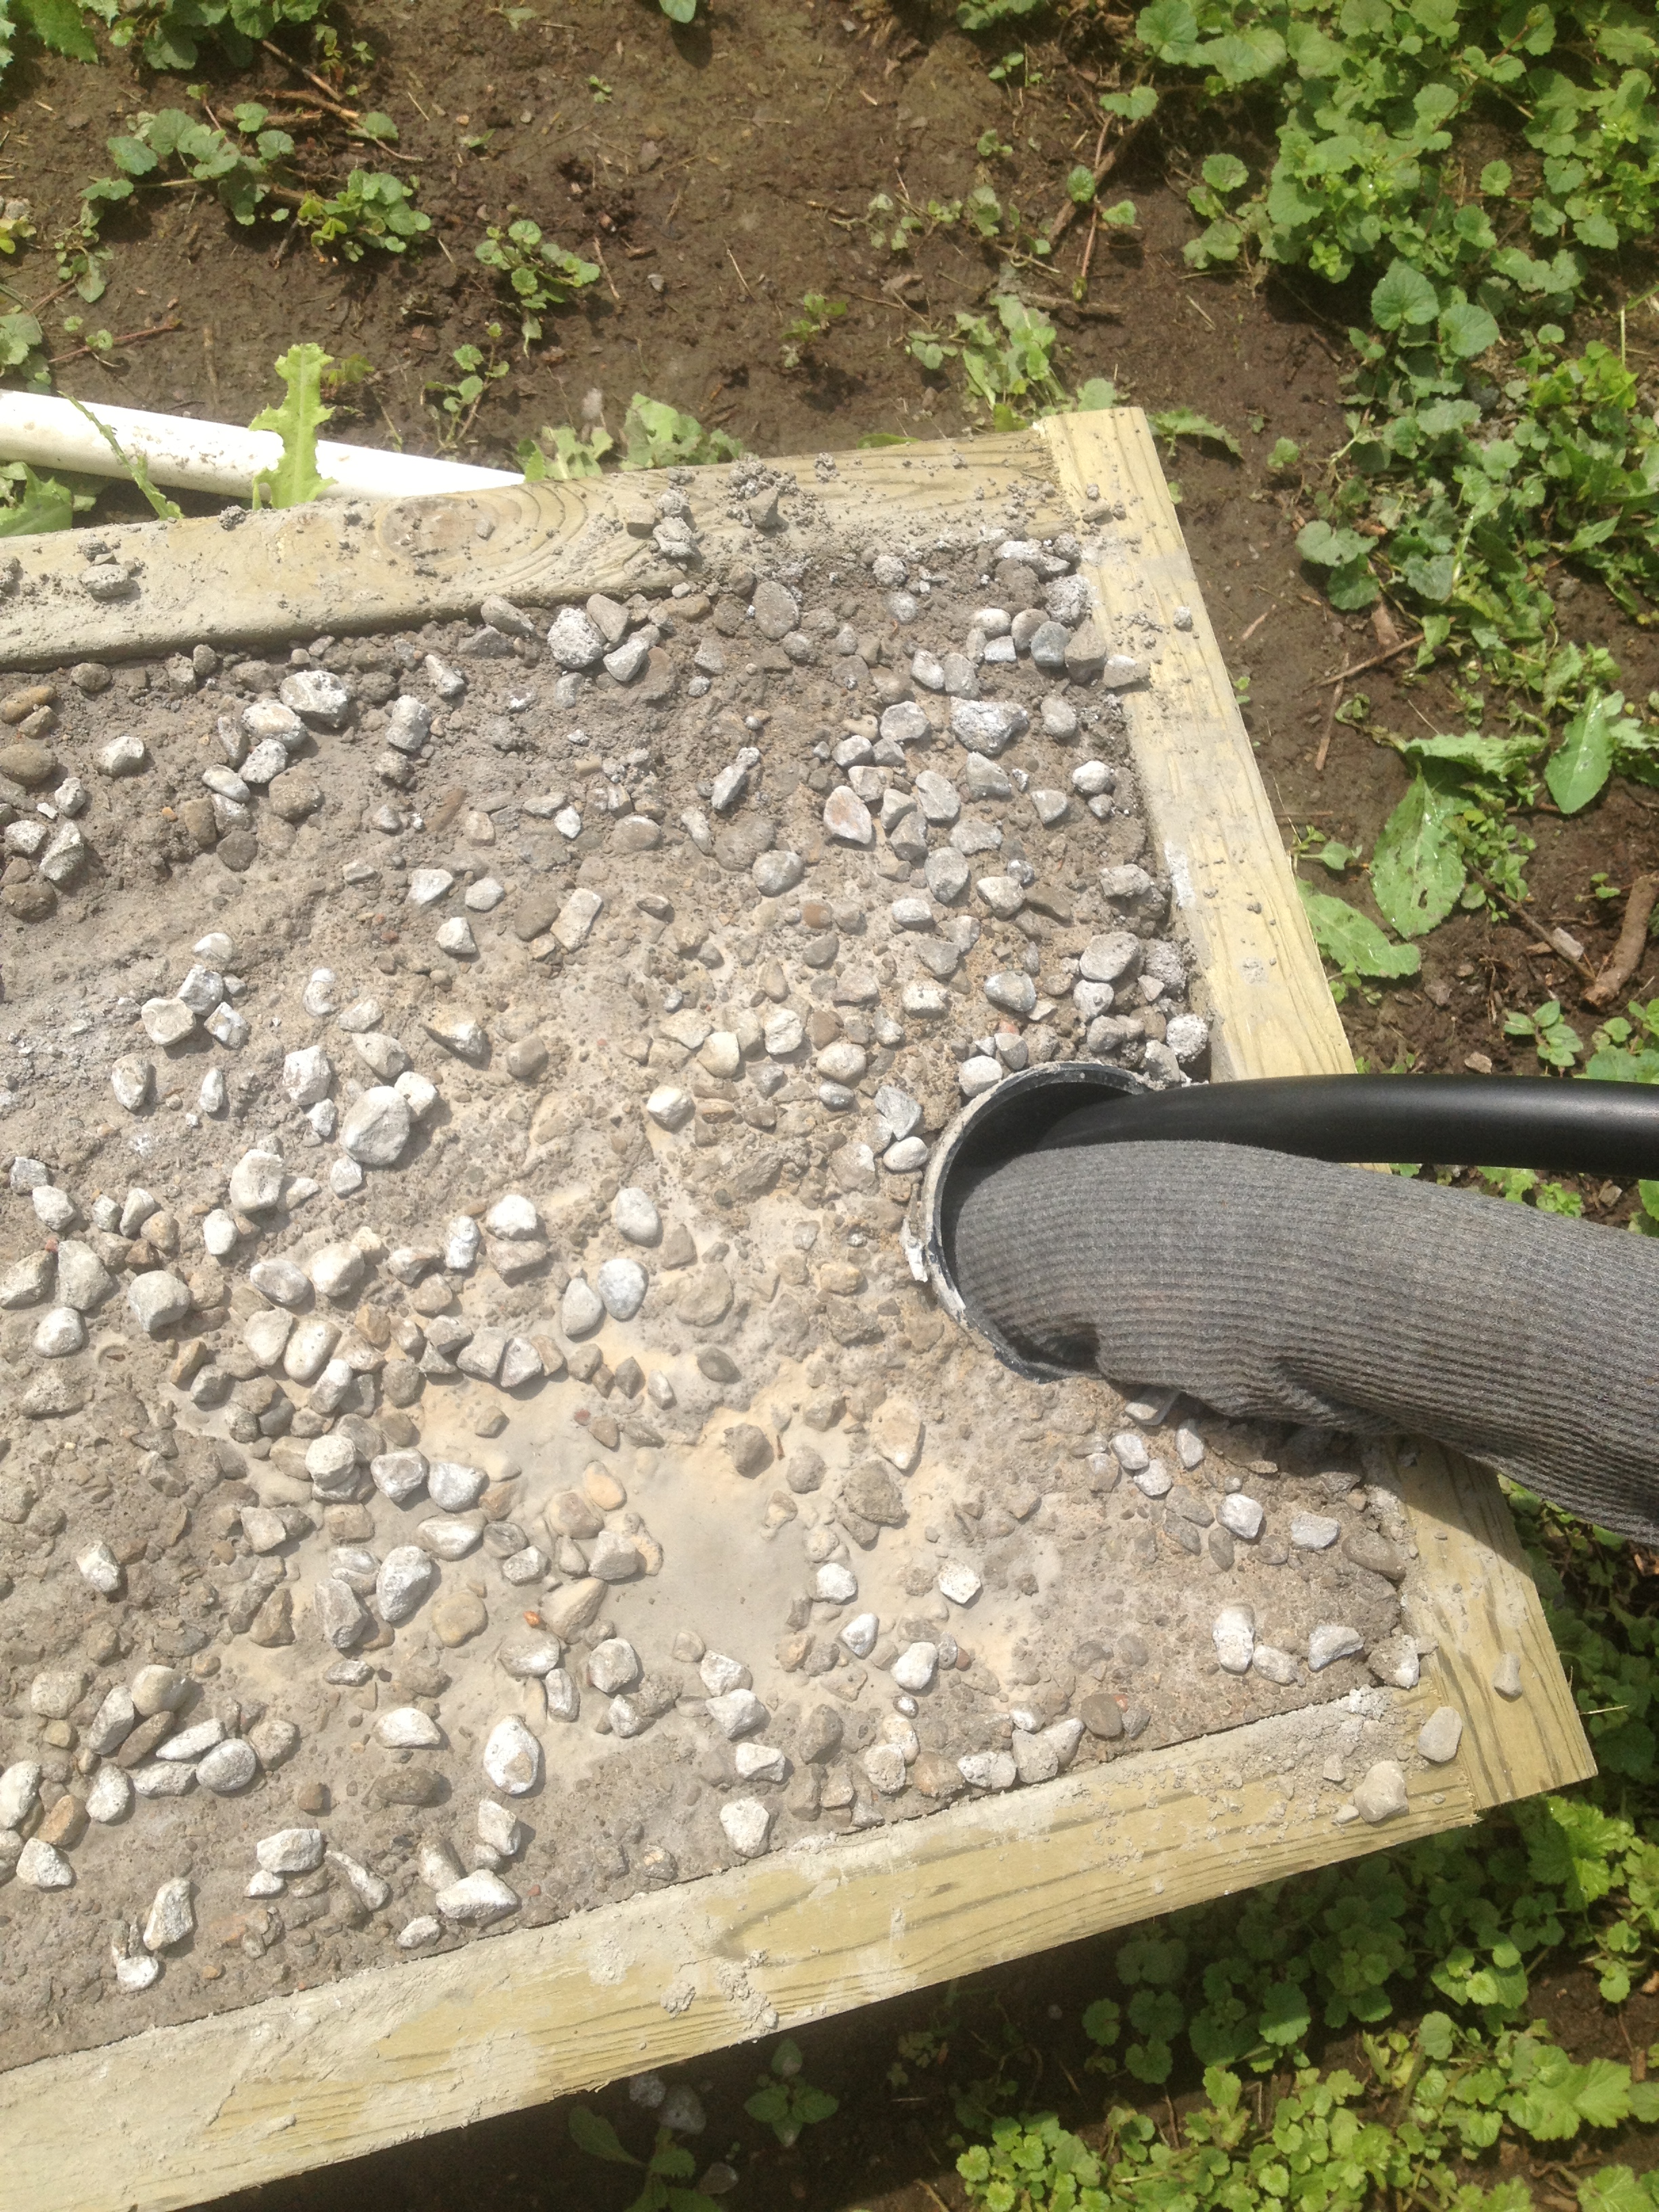
The drill is an easy one. Pay attention when you are out in your first due for anyone throwing out a fridge, freezer, stove, etc. Place the appliance at the end of a small piece of corrugated tubing and ratchet strap the appliance to the end of the tube so that it does not move.

Now you can use as many different cutting tools as you can to make the hole large enough to pass a rescuer through. To make the drill even more difficult you can stick metal or other stuff inside the appliance that will have to be cut.

fridge3 fridge5 fridge6 fridge7 fridge9

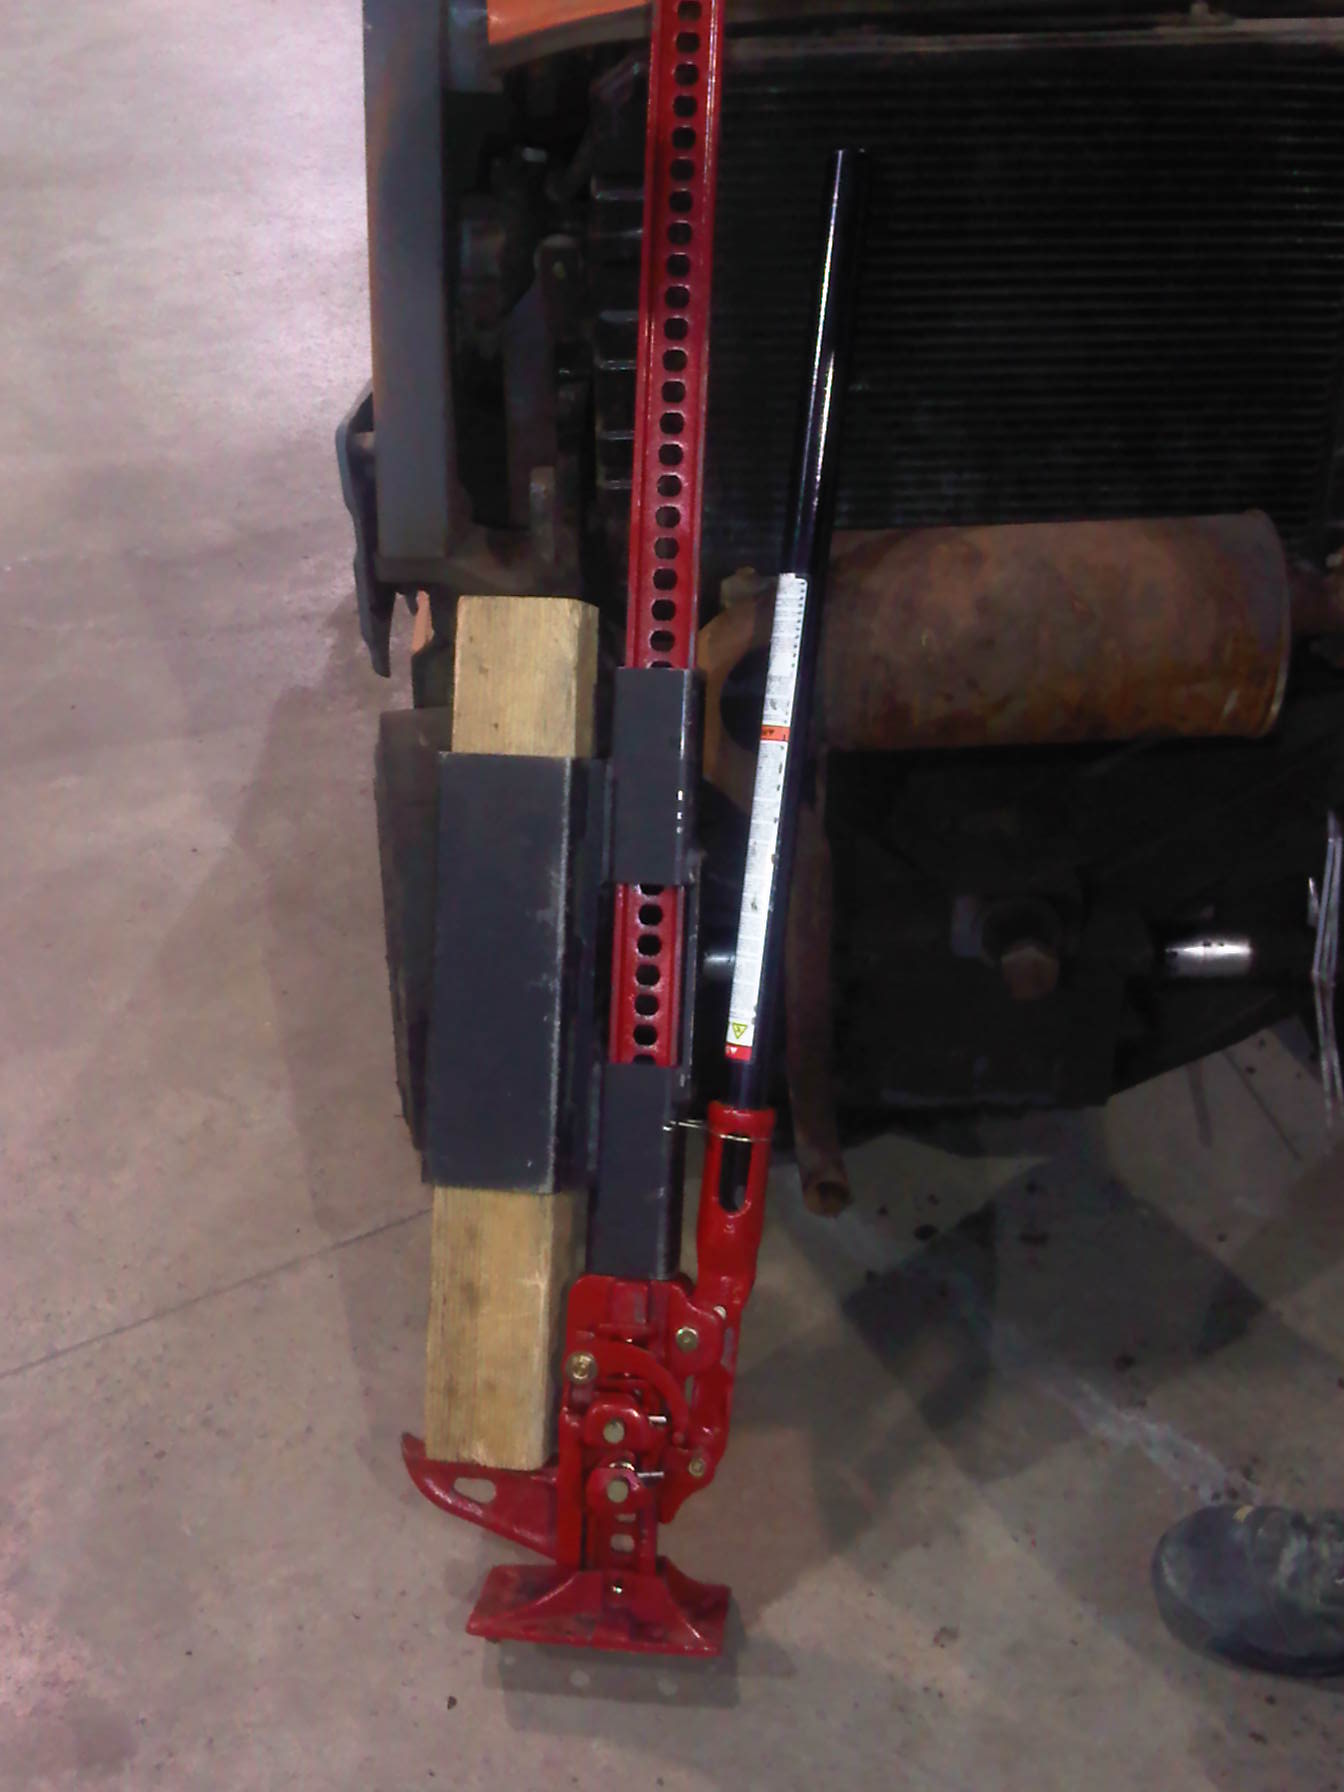
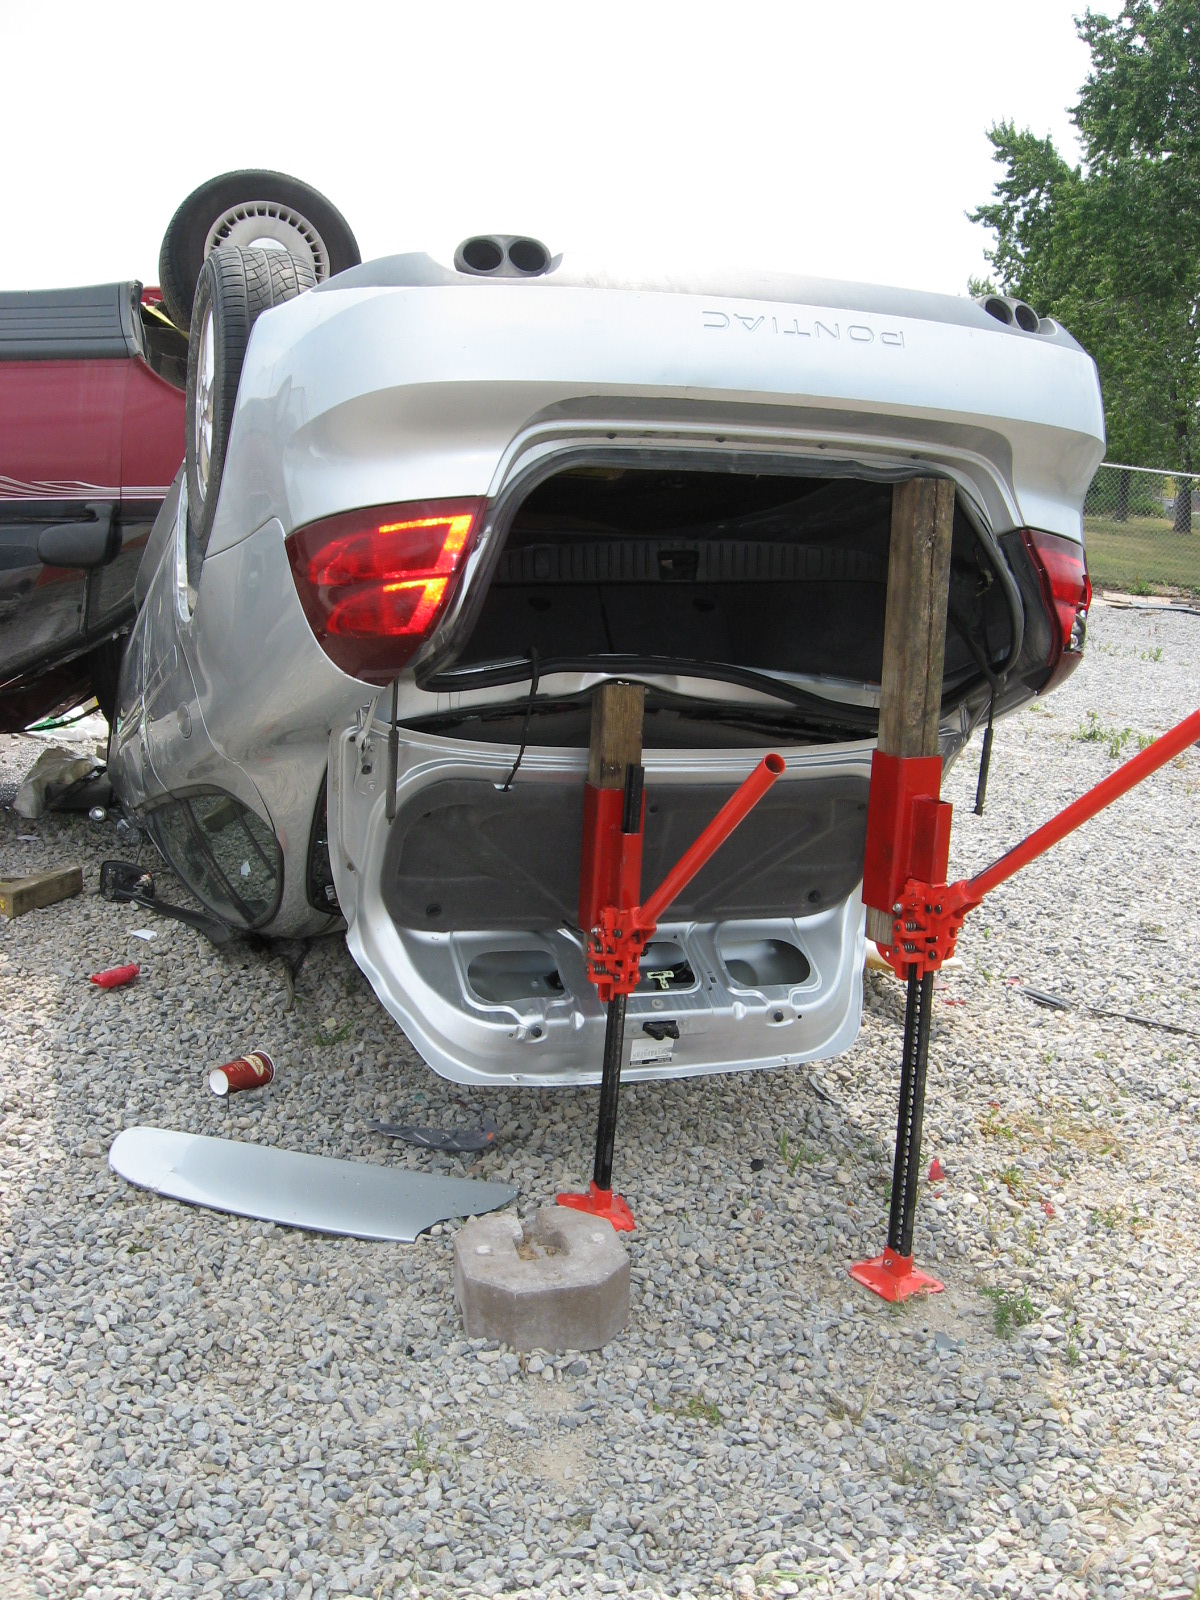
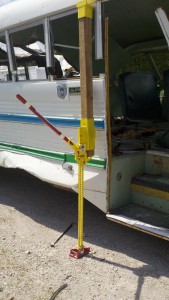
Mini Shoring for Collapse Rescue

Collapse rescue can be very costly, especially when it comes to training and drilling with your crew. Lets be honest not many departments have the luxury of being able to go out and build full size collapse rescue systems out of full dimensional lumber on a monthly basis.

cfd28 cfd27

An easy way to still be able to drill, and keep this stuff in your guys heads is to build mini version of these shoring systems. You can use just regular lumber that you have laying around or you can buy actual to scale model wood from hobby shops.

This will give you the opportunity to work out load calculations, angles, nail patterns, etc.

cfd30 cfd29

Remember that this does NOT in anyway replace your standard collapse training, this is simply a quick 1 hour refresher drill to keep this stuff fresh in everyone’s mind.

cfd26 cfd25

Just a couple small ideas that can help keep your crew on their toes!

Till next time, training is everything!
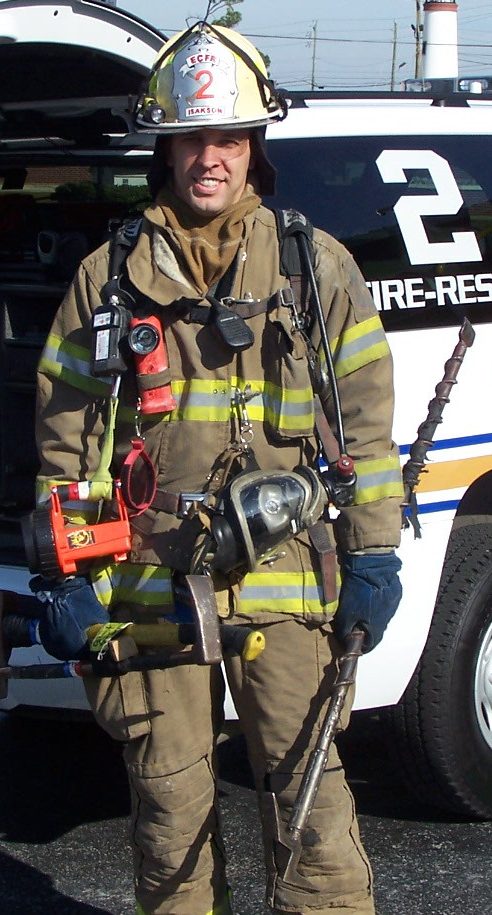
Andrew Brassard

Milton Fire Department

Pumper 31


Swift Water Rescue Training

Hard work, passion, and a little ingenuity is all you need to come up with fantastic company level training. You don’t need a big training facility to put on great training, you just need to use some imagination.

This is a prop that the Austin Fire Department in Texas put together for training their members in car removals in swift water rescue situations.

swiftwater2

They put a car into a boat launch so that most of the car was submerged, they then used handlines of an engine company and a fire boat to cause the river like effect. This allowed them to preform various removal techniques in easily controllable situations.

swiftwater3

swiftwater1

Not only does it get your members out doing swift water training but it also gets you out stretching hose, pumping your lines, ropes and knots, medical, setting up your ladder truck, and anything else that you wanted to put into the scenario.

swiftwater5

swiftwater4

http://www.kxan.com/news/local/austin/first-responders-prepare-for-low-water-crossing-rescues

So get out their and push your training to the next level. A serious “hat tip” to the Austin Fire Department on this training.

Hi Lift Jacks

Hi Lift Jacks are a tremendous tool in our rescue “tool box”, they have a great lift capacity and they have a tremendous amount of lifting/spreading/pulling distance that they can travel. I think that this tool has gotten a bit of a bad rap over the years and I think that allot of it has to do with our over reliance on Air Bags as our primary lifting tool. For me though I feel that the Hi Lift Jack gives much more versatility than allot of people know about and they have tons of applications on the rescue ground.

Pulling Tool
The Hi lift jack can make a great pulling tool as well as a lifting tool; using some chain and shackles it can become extremely useful at pulling or lifting heavy loads also. Several different attachments can be bought to allow you to attach chain to with ease.
jack3

jacks 1

jacks4

Lowering the Center of Gravity and Extending the Reach
One of the biggest complaints about the jacks is that they can become unstable at height because of the center of gravity rising. One awesome attachment that I have seen is the OJ Sleeve. The OJ Sleeve got its roots from Retired Battalion Chief Ron Zawlocki of the Pontiac, Michigan Fire Department. I first saw it at a Machinery Rescue Class in Howell, Michigan. The design came out of necessity, when you think about it we have a bunch of great options for lifting things that are relatively close to the ground. We have air bags, bottle jacks, hydraulic spreaders, etc…. all these tools are great and provide a tremendous amount of lifting power, but they all have very minimal spreading distance and they can only lift very minimally off the ground with out cribbing. The OJ Sleeve solves the problem of lifting and spreading loads that are beyond 4 ft off the ground… extremely fast!

Machine9

Machine14

b shift training 004

The sleeve is a homemade sleeve and it is made to hold a 4×4 of any length vertically, this makes an awesome lifting post and it keeps the center of gravity in the lifting carriage extremely low to the ground increasing its stability.

The OJ Sleeve has a ton of uses such as:
• Closing the gap without using tons of cribbing
• Lifting things at height
• Pushing
• Stabilizing

jacks5

HeavyLift6

HeavyLift5

The other great thing about Hi Lift Jacks is that they require no exterior power source other than muscle power. They do not require set up… they are simple and are always ready to work. I also love the fact that they will work in any condition, smoky conditions for RIT, under and around water, etc.

The Hi Lift Jack is a fantastic tool and has tons of uses, so dust them off and get them out of the compartment where they have been for years and train on them…. Use them to

Rope Rescue Edge Pro

Edge protection is a vital piece of the rope rescue puzzle but it is often overlooked or done improperly. Over the last 15 years of teaching rope rescue and working for a department that gets our fair share of high angle calls I have used almost every type of edge protection out there… most leave little to be desired.

Now their is a difference in wether you are doing a rope rescue in a urban setting (off of a crane or off an apartment building) or weather you are operating in a wilderness setting. If you are working in an urban setting the rope protection is fairly easy, a couple small rollers and you are set. But in a wilderness setting it can be slightly more difficult, the rope has several different rocks, tree roots, etc. that it can pass over. Several years ago I was shown a homemade version of edge protection that is still the best I have used to date.

caver11

The edge protection is made using small diameter wood dowels that are strung together with some old 6 millimeter cord. The dowels are cut to length, drilled, sanded and then they are ready to be assembled. Small sections of clear water pump tube can be used as spacers on the ends to keep the dowels spaced.

caver23

Once the edge protection has been made and it is placed on the rocks you will see how it can bend and be manipulated into the small cracks and forms to the shapes of the rocks. It makes a perfect “valley” for the rope to travel through, and you don’t have to worry about the rope wrecking your edge pro due to friction or sharp rocks.

caver1

The homemade edge pro folds up easily and is carried in our rope rescue bags, it weighs a little more then some commercially sold edge pro but I feel the extra pound is well worth the trade off.

roperescue1

The edge pro can also give you some added footing if the edge is slippery or there is the potential for loose ground. The whole edge protection cost about $20, which is well below the average cost for some edge pro.

Torch Training

DSCN3415

Cutting torches are one of the best most expedient metal cutting tools at our disposal in the rescue world. Like anything we do in the fire service training and experience are paramount in our success on the fire/rescue ground, torch work is no different. Most torch training I have seen usually consists of firefighters placing some scrap metal in a bench vice on the work bench and then taking turns lighting the torch and making a few cuts in the metal, this type of training is essential and it does have its place to get firefighters comfortable with the torch… but where do we go from there? Is that pushing our training to the next level? Is that preparing us for the real deal on the rescue ground?

When we need a torch on the rescue ground it will be for crawling under a machine to free a trapped limb or operating in a building collapse, we won’t always have the ideal body position to make cuts. Well if that is the case then we need to ensure that we train to that standard.

DSCN3412

Recently, Lt. Grant Light did a drill with the rest of his crew on Cincinnati Heavy Rescue 9. The drill was simple, they used a small piece of culvert with an “A” frame ladder at the end of it with pieces of scrap metal lashed to it. Each member had to enter the tube, light the torch, and make some cuts.

DSCN3405

DSCN3401

This allowed the members to practice cutting in extremely awkward positions… which is real life! Pushing your training to the next level is imperative, a cutting torch is only as good as it’s operator.

DSCN3417DSCN3430

Special thanks to Lt. Grant Light from Cincinnati Heavy Rescue 9 for passing us along these great pictures and great training ideas.


Hand Stuck in Paper Shredder

Accidents happen and people always seem to find new ways of injuring themselves. I was doing some research for a training drill I was going to do with my crew when I came across an interesting extrication scenario, when I looked into it further I was amazed at how often it actually happens. The scenario was a person who got their hand stuck in a paper shredder. I happens more than you would think! People attempting to clear out paper jambs without turning the machine off is the leading cause or entrapment but I was also surprised to find that woman with long finger nails was another major cause.shredder

If we respond to a call like this there are obviously some things that we need to keep in mind, insuring that the machine is turned off and unplugged is going to be paramount… but insuring that the machine cannot be re plugged in by accident is also going to be a priority. This can be accomplished a couple different ways:

1) You can use a specific lock out tag out device designed for extension cords

2) You can cut the plug end off

shredder11

After lock out tag out has been completed and all of the proper medical procedures have been put into place extricating the patient can commence. Extricating the patient is not going to be that difficult if you have the proper tools, equipment, and training. Having a good selection of screw drivers at your disposal is going to be key, the machine can be very easily disassembled in a few minutes.

shredder2

I wanted to recreate this extrication scenario for my crew so I went to a thrift store and found an old paper shredder for $3, I used a foam hand and ran it into the shredder. I had my crew go through the scenario including lock out tag out, medical, and extrication.

shredder5

It was a short training drill but the guys took a lot out of it and it got them thinking, it also allowed some of our members that don’t have a high level of mechanical aptitude to hone their skills and get better skilled with the most basic of tools.

shredder7

Till next time, push your training to the next level.


Hand in Drain Pipe

A husband and his wife are attempting to snake out the basement floor drain. The husband sees some debris enter the back of the drain, he instinctively sticks his hand down there to clear the debris just as his wife turns the snake on. The snake impales the mans hand and pulls his arm into the drain causing his hand and arm to become stuck. This exact scenario has played out to a couple of friends of mine from 2 different departments, and you can see how this could easily happen again.

machinerescue1
Picture of actual snake and pipe that a mans arm was extricated from.

I wanted to try to recreate this scenario in training, I thought it was a great scenario and it gave you multiple materials to cut. So I set out to build a fairly cheap prop to reenact this rescue scenario. I built a small box out of old wood that I had laying around, this would act as a form for the concrete that I was going to pour in it. I also used some left over PVC pipe that I had to make a section of drain that the arm would be stuck in. Once the PVC pipe was in place and capped the form was filled with a couple bags of quick dry cement.

handpipe5

After the cement is dry it was time to build the arm and auger. I use the foam in the glove trick from our previous post. I used a small spring epoxied on the end of a old hose to act as the snake. Once the finger was wrapped up in the snake I put it into the drain pipe and we were ready to drill.

handpipe6
handpipe2

To start the scenario we talked about medical considerations ad we also discussed non evasive solutions we could do (soapy water, etc). Then it was down to the extrication, we used a Partner saw with a diamond blade to cut the concrete and the pipe out.

hand in pipe4

Once we had all the concrete broken off the pipe we used a Dremal tool to dissect the pipe, a multitude of other cutting tools could be used for this operation but we chose to stick with the Dremal tool for this drill.

hand in pipe11
hand in pipe7

We used old hacksaw blades for hard protection from the saw blade. The Dremal worked extremely well at cutting the PVC, another tool that could possibly be used is a PVC Wire Cutter. Once the arm was free from the pipe we needed to cut the metal spring that acted as the snake, again the Dremal was used but far more accurate cuts were needed. A mix of some modified spoons and some old hacksaw blades were used to act as hard protection to protect the patient.

All in all it was a great drill to show several different types of material in one scenario.

Use your imagination and push your training to the next level, you may never go to an extrication like the one we described in this drill but it will help build a tremendous set of skills that you can use in other types of extrication calls.

The Prop Shop- Hand Prop

I think most people would agree that company level fire training is the back bone of our great profession, it is the day to day stuff that you drill on with your crews that has the biggest impact on our efficiency and effectiveness on the fire or rescue ground. So what are we looking for in a company level drill? Well for me it needs to be realistic, hands on, easily repeatable, and it does not require 4 hours of set up time. 

One of the little props I came up with for machine rescue training is a way to make cheap limbs that we could use to get entangled in different pieces of machinery that we could find. Using the typical rescue mannequin hands was usually a little to difficult due to the hand not bending or reacting like a real limb. An easy prop that you can build at the firehouse for under $10 is take an old pair of work gloves or fire gloves and fill them with expanding spray foam (the type you use for insulating around doors and windows). Simply spray the foam into the glove, be sure to get it down into the fingers and only fill the glove up halfway. Hang the gloves up on a clothes line to dry and expand. Once the foam is dry you can use a serrated knife to trim the access foam from the top of the glove.

Image

What you end up with after the foam dries is a firm, flexible, realistic hand that you can use several times for anything from machine rescue to impalement drills. It works great and is extremely cheap to do.

Image

If you are looking to add even more realism to the prop you can also add an arm to the prop. To add the arm take a pool noodle and insert it down into the wet foam and then add some additional foam around the pool noodle, when the foam dries it will have “cemented” the noodle into the glove. Adding the arm works great if you want to entangle it into a lawn mower, snow blower, some rollers, etc.

Image

Image

Image

You can also make a quick and easy leg the exact same way, simply take a shoe or boot and fill the toes with foam and then stick the pool noodle down into the shoe and fill the foam all around it. To make it even more realistic you can add clothes to the leg to make the rescuer have to cut the clothing away from the machine also.

Image

This is a simple, cheap, easy way to make props that will help you out a ton with your in house training.