Hand in Drain Pipe

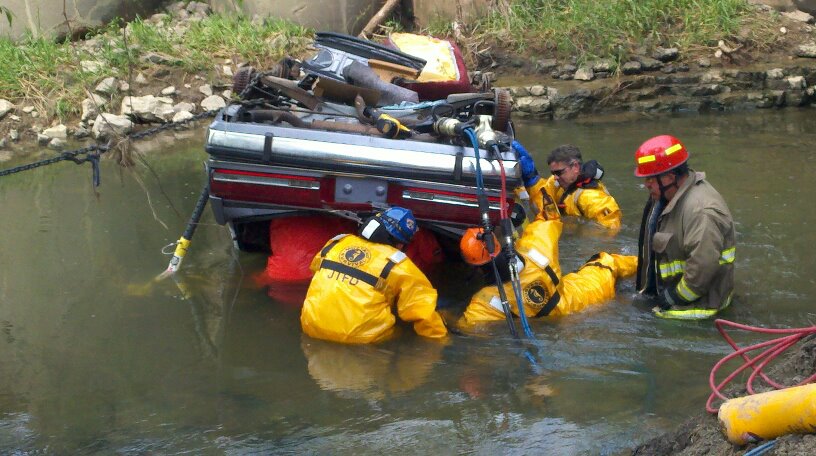
A husband and his wife are attempting to snake out the basement floor drain. The husband sees some debris enter the back of the drain, he instinctively sticks his hand down there to clear the debris just as his wife turns the snake on. The snake impales the mans hand and pulls his arm into the drain causing his hand and arm to become stuck. This exact scenario has played out to a couple of friends of mine from 2 different departments, and you can see how this could easily happen again.

machinerescue1
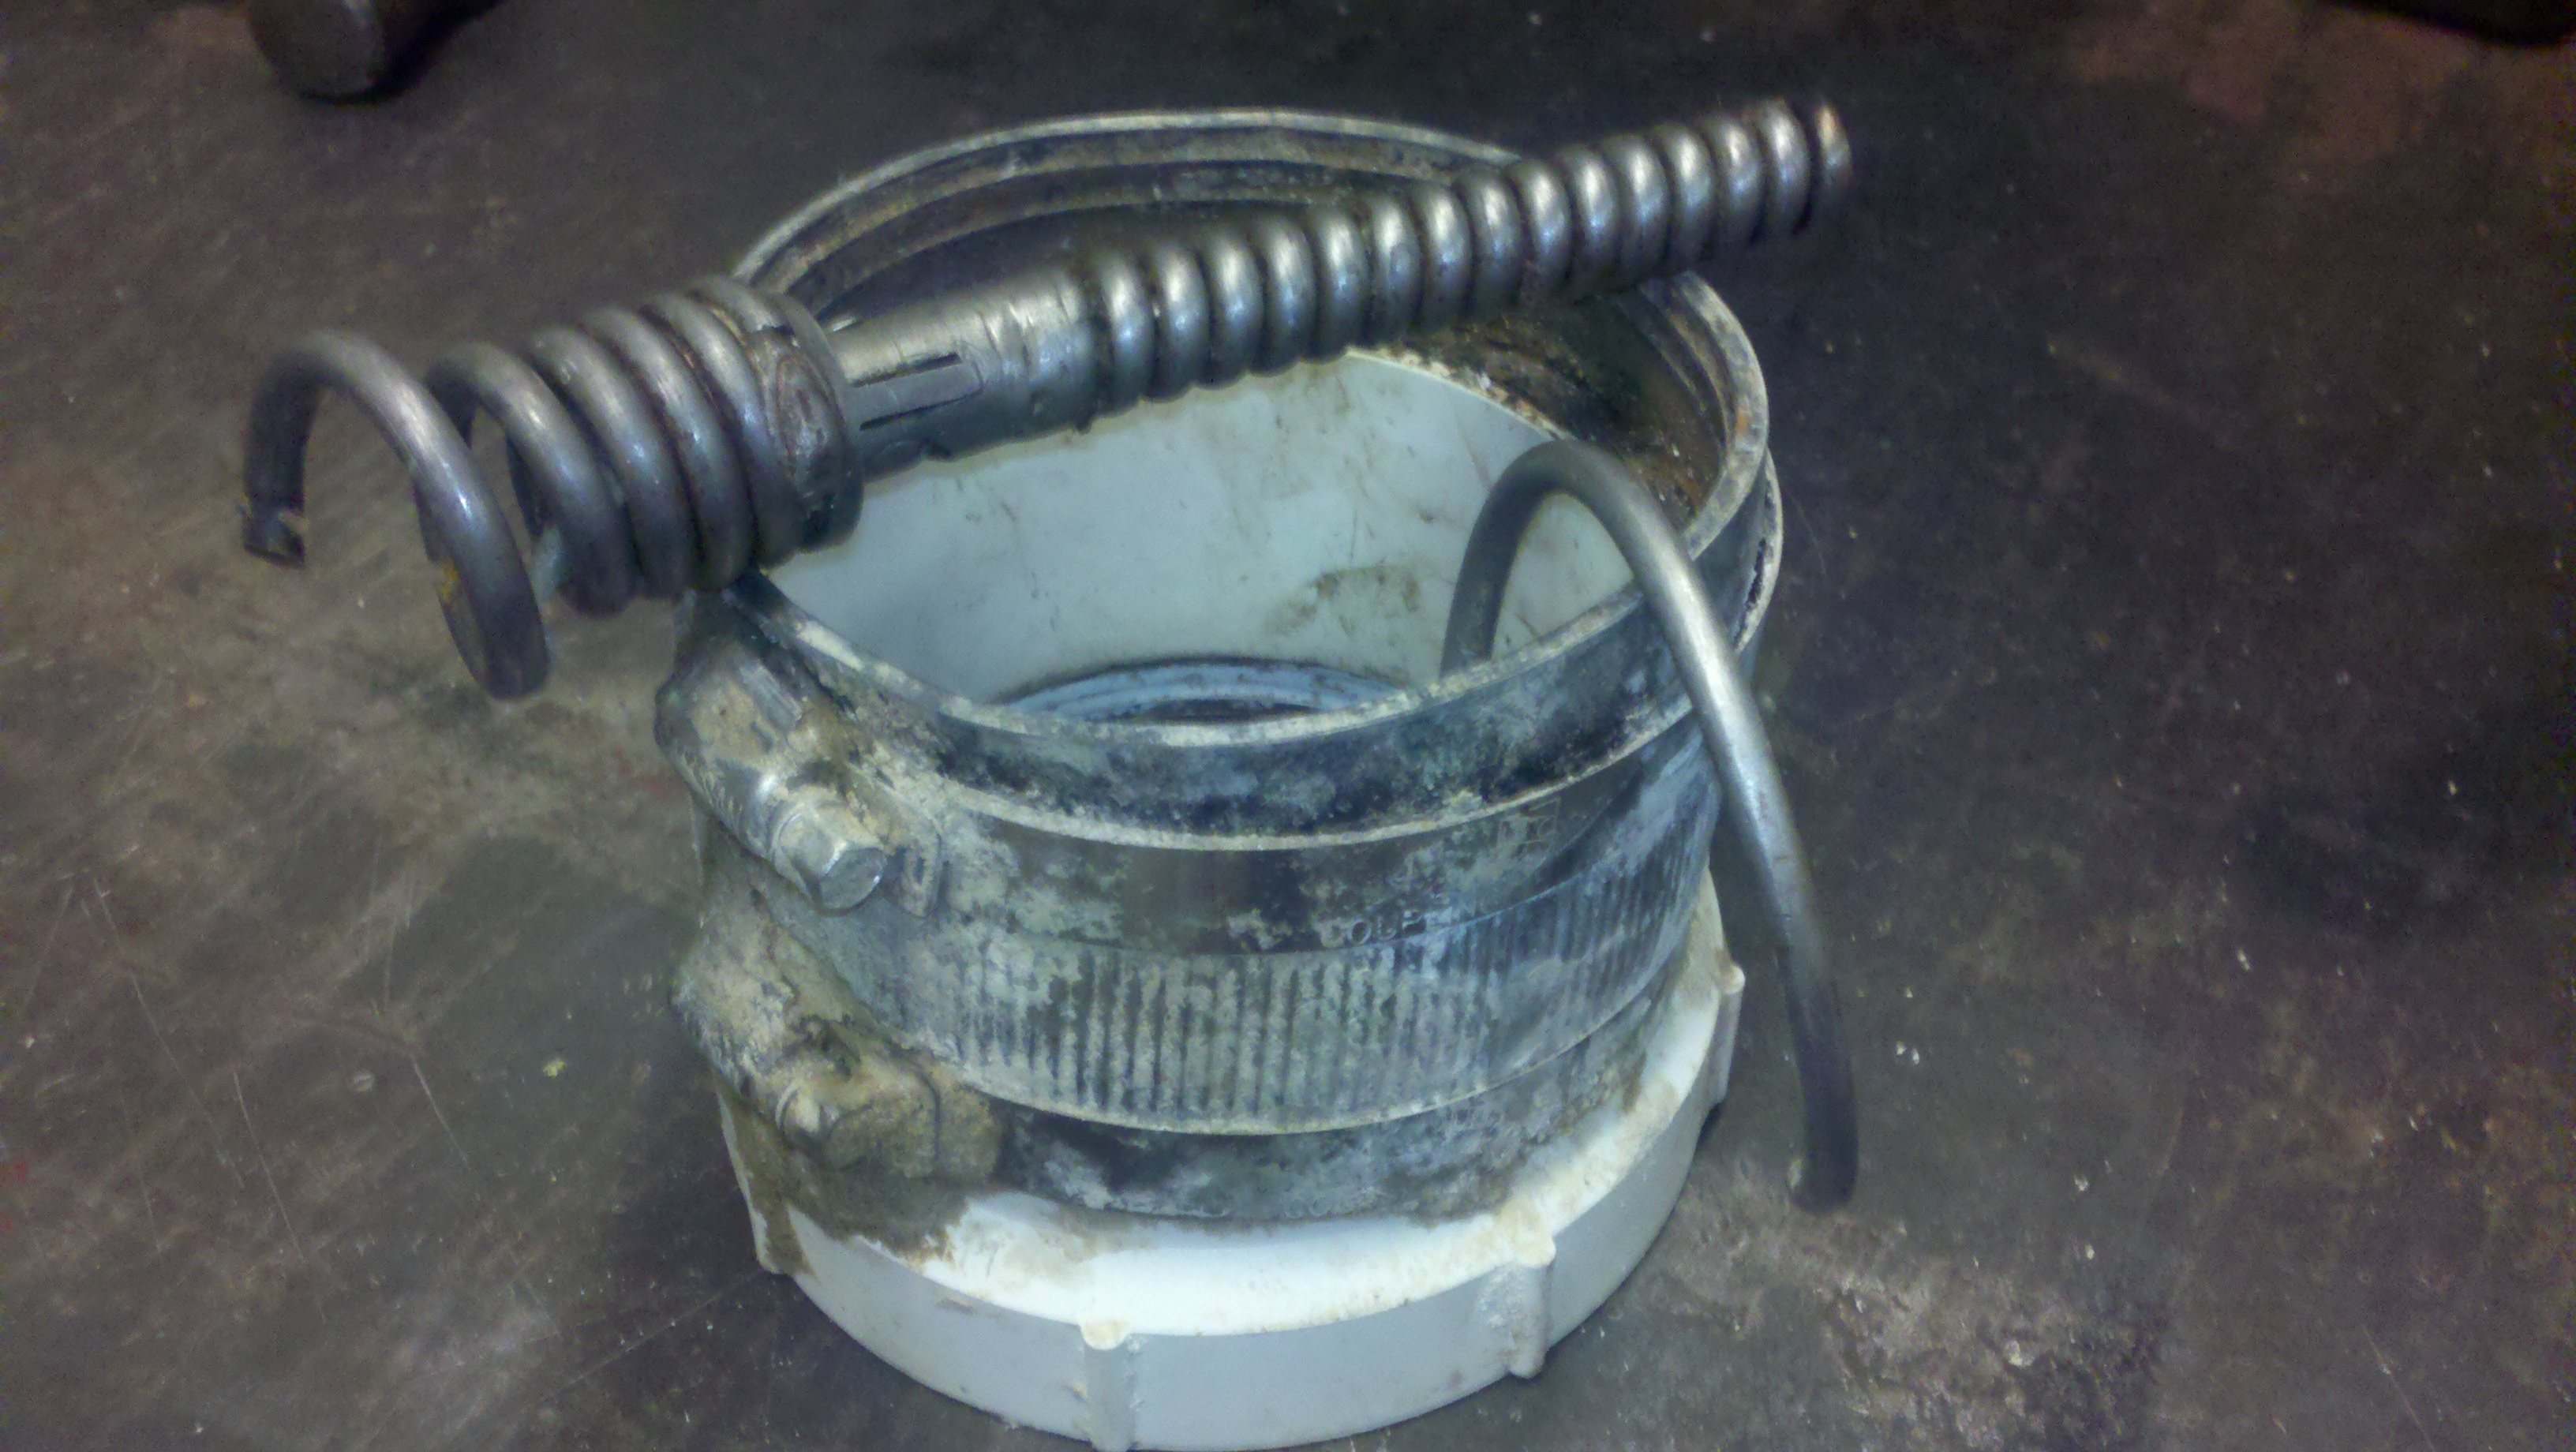
Picture of actual snake and pipe that a mans arm was extricated from.

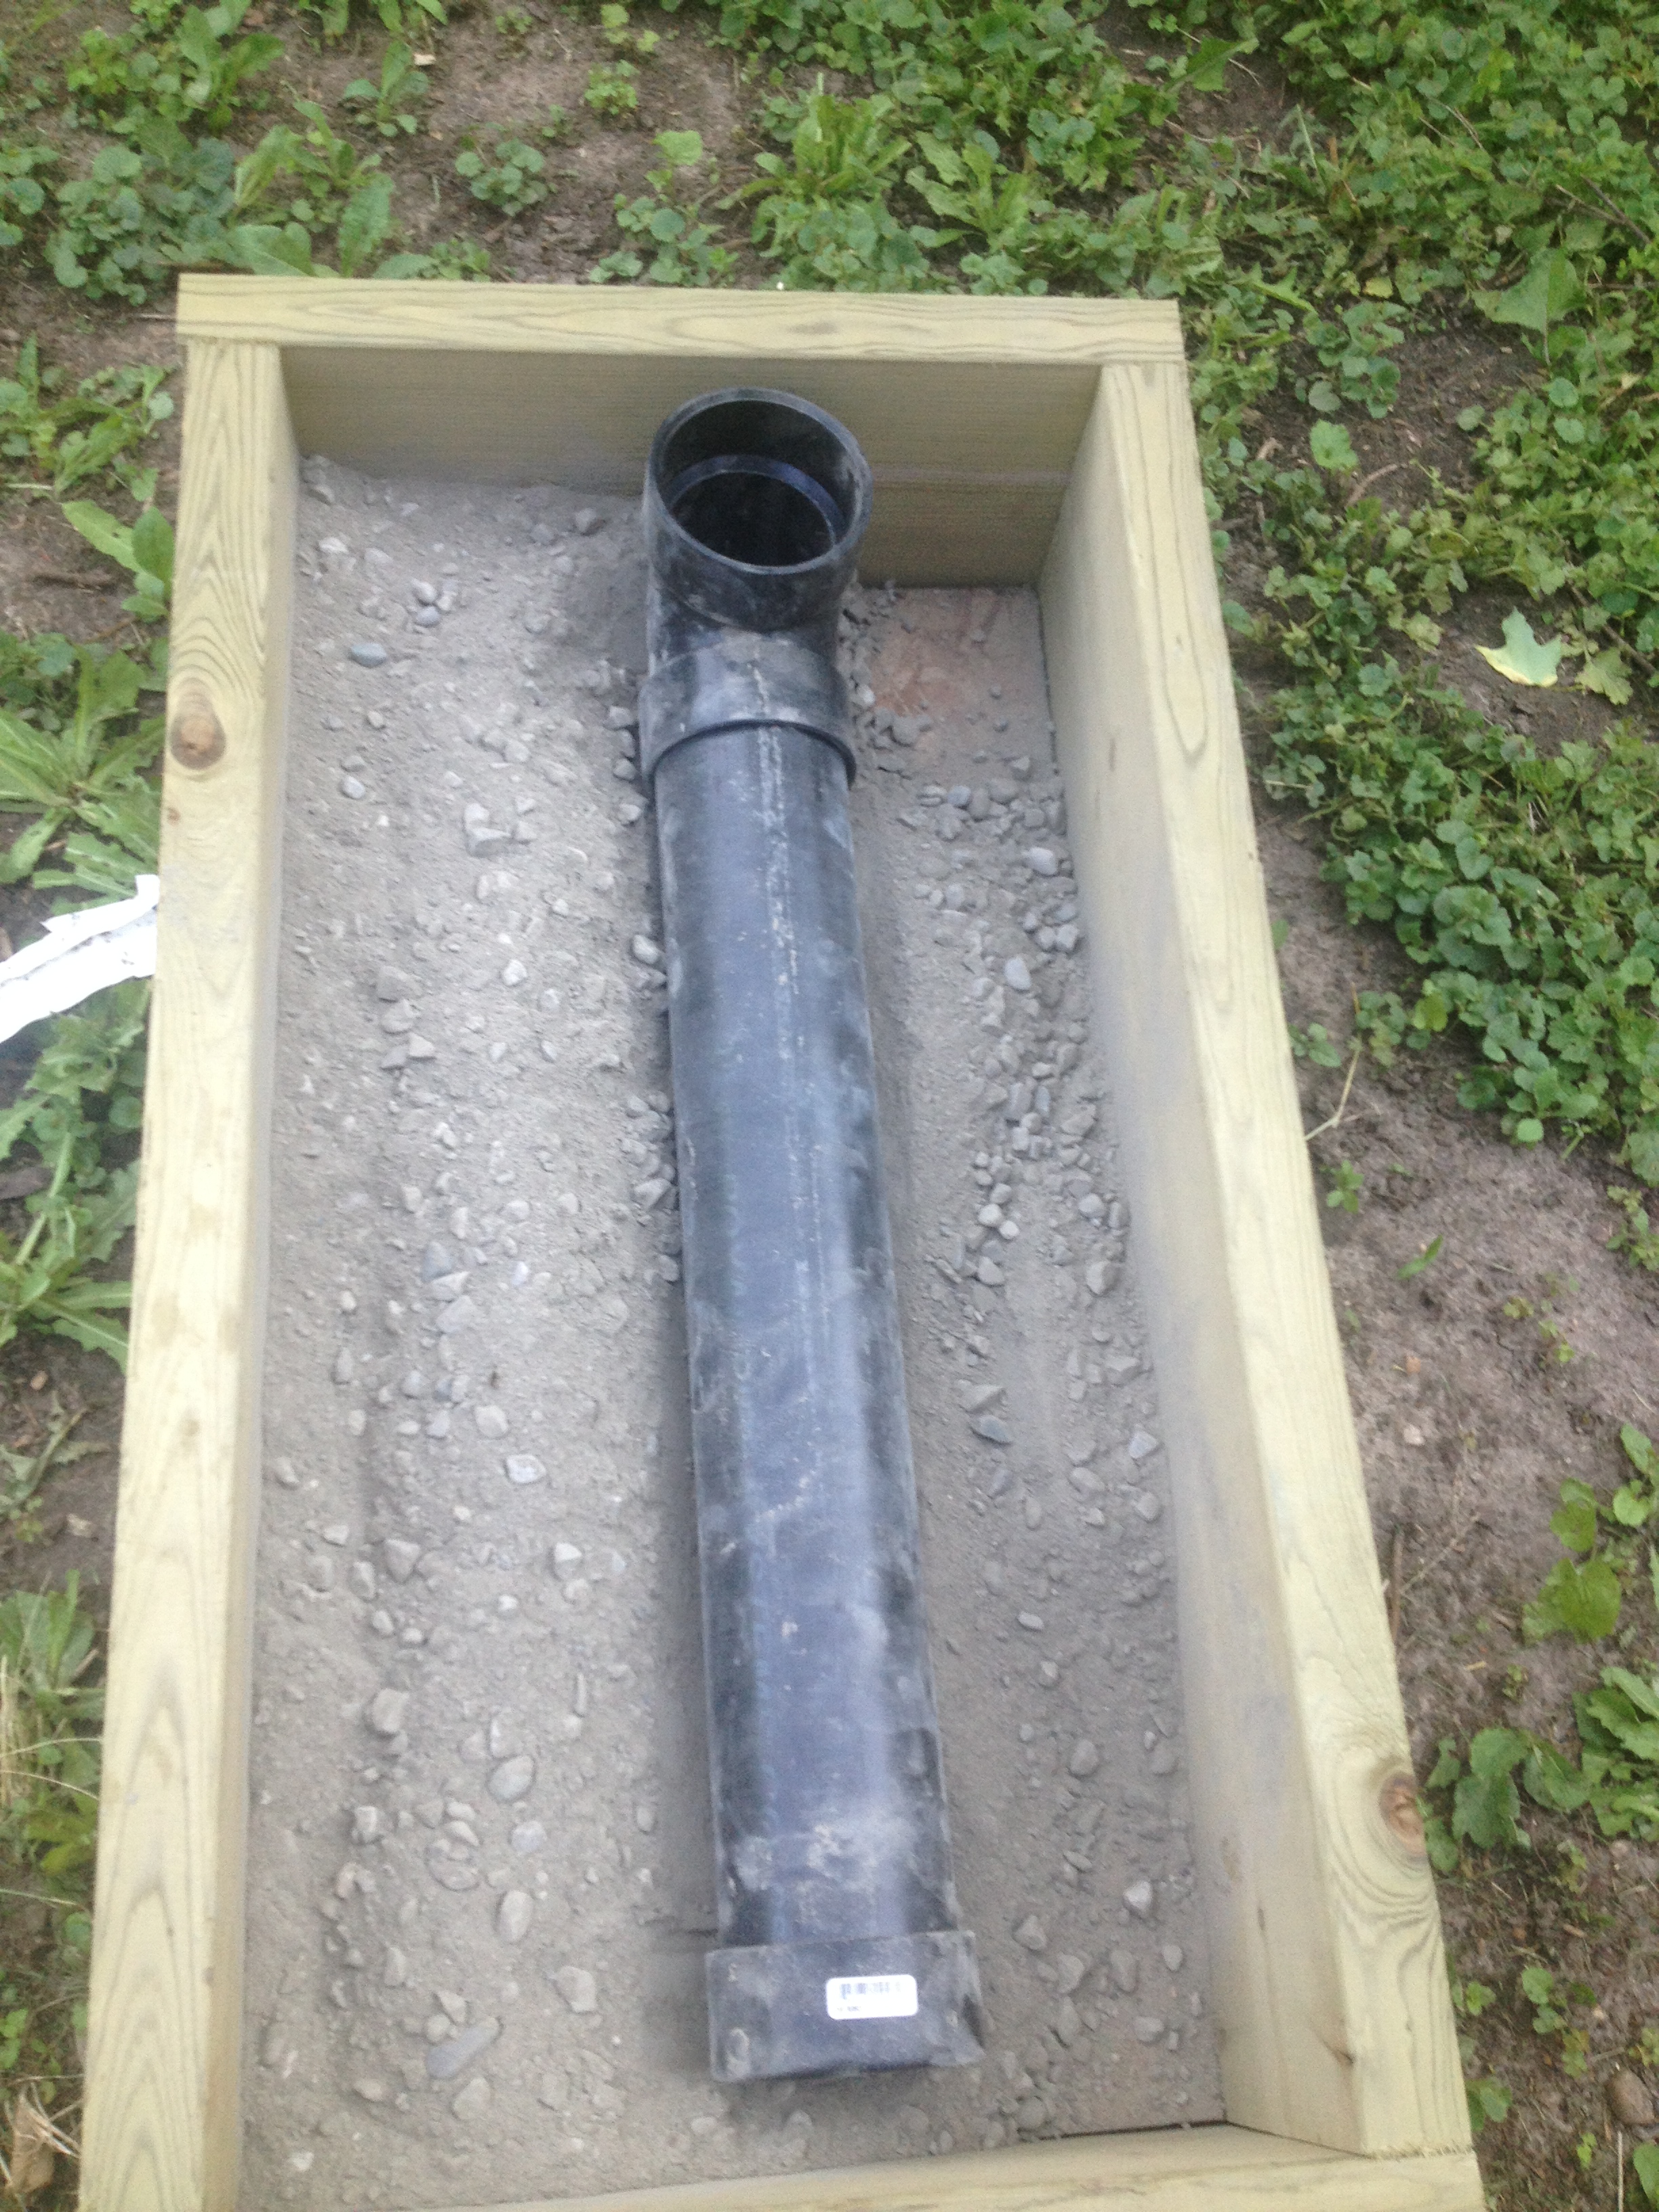
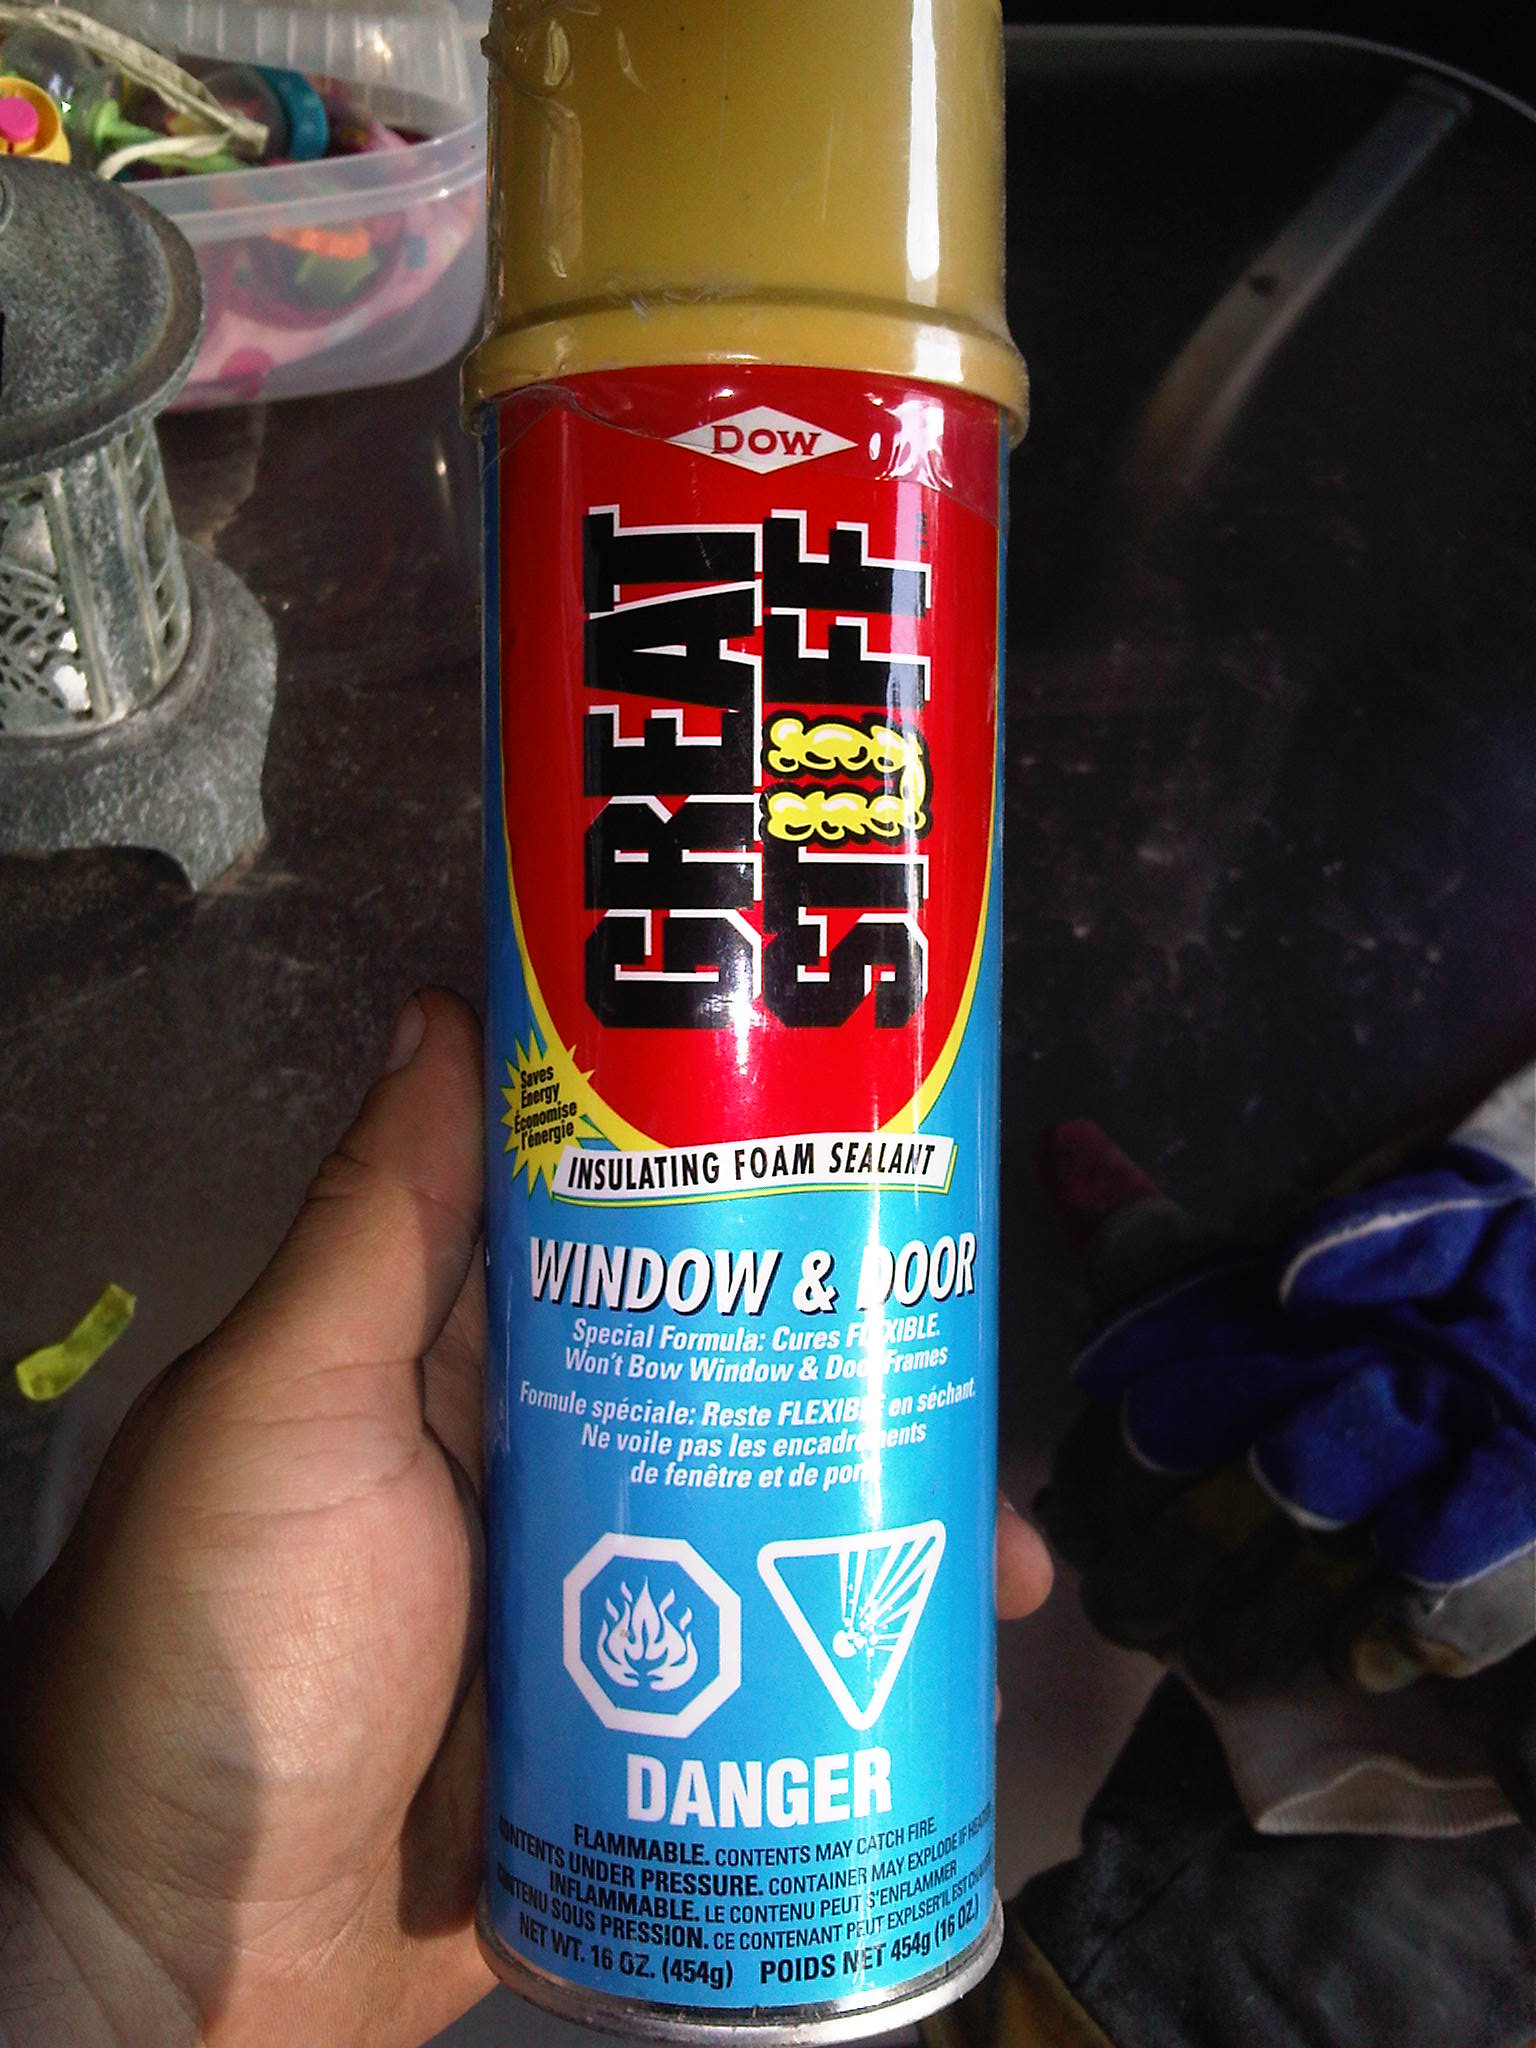
I wanted to try to recreate this scenario in training, I thought it was a great scenario and it gave you multiple materials to cut. So I set out to build a fairly cheap prop to reenact this rescue scenario. I built a small box out of old wood that I had laying around, this would act as a form for the concrete that I was going to pour in it. I also used some left over PVC pipe that I had to make a section of drain that the arm would be stuck in. Once the PVC pipe was in place and capped the form was filled with a couple bags of quick dry cement.

handpipe5

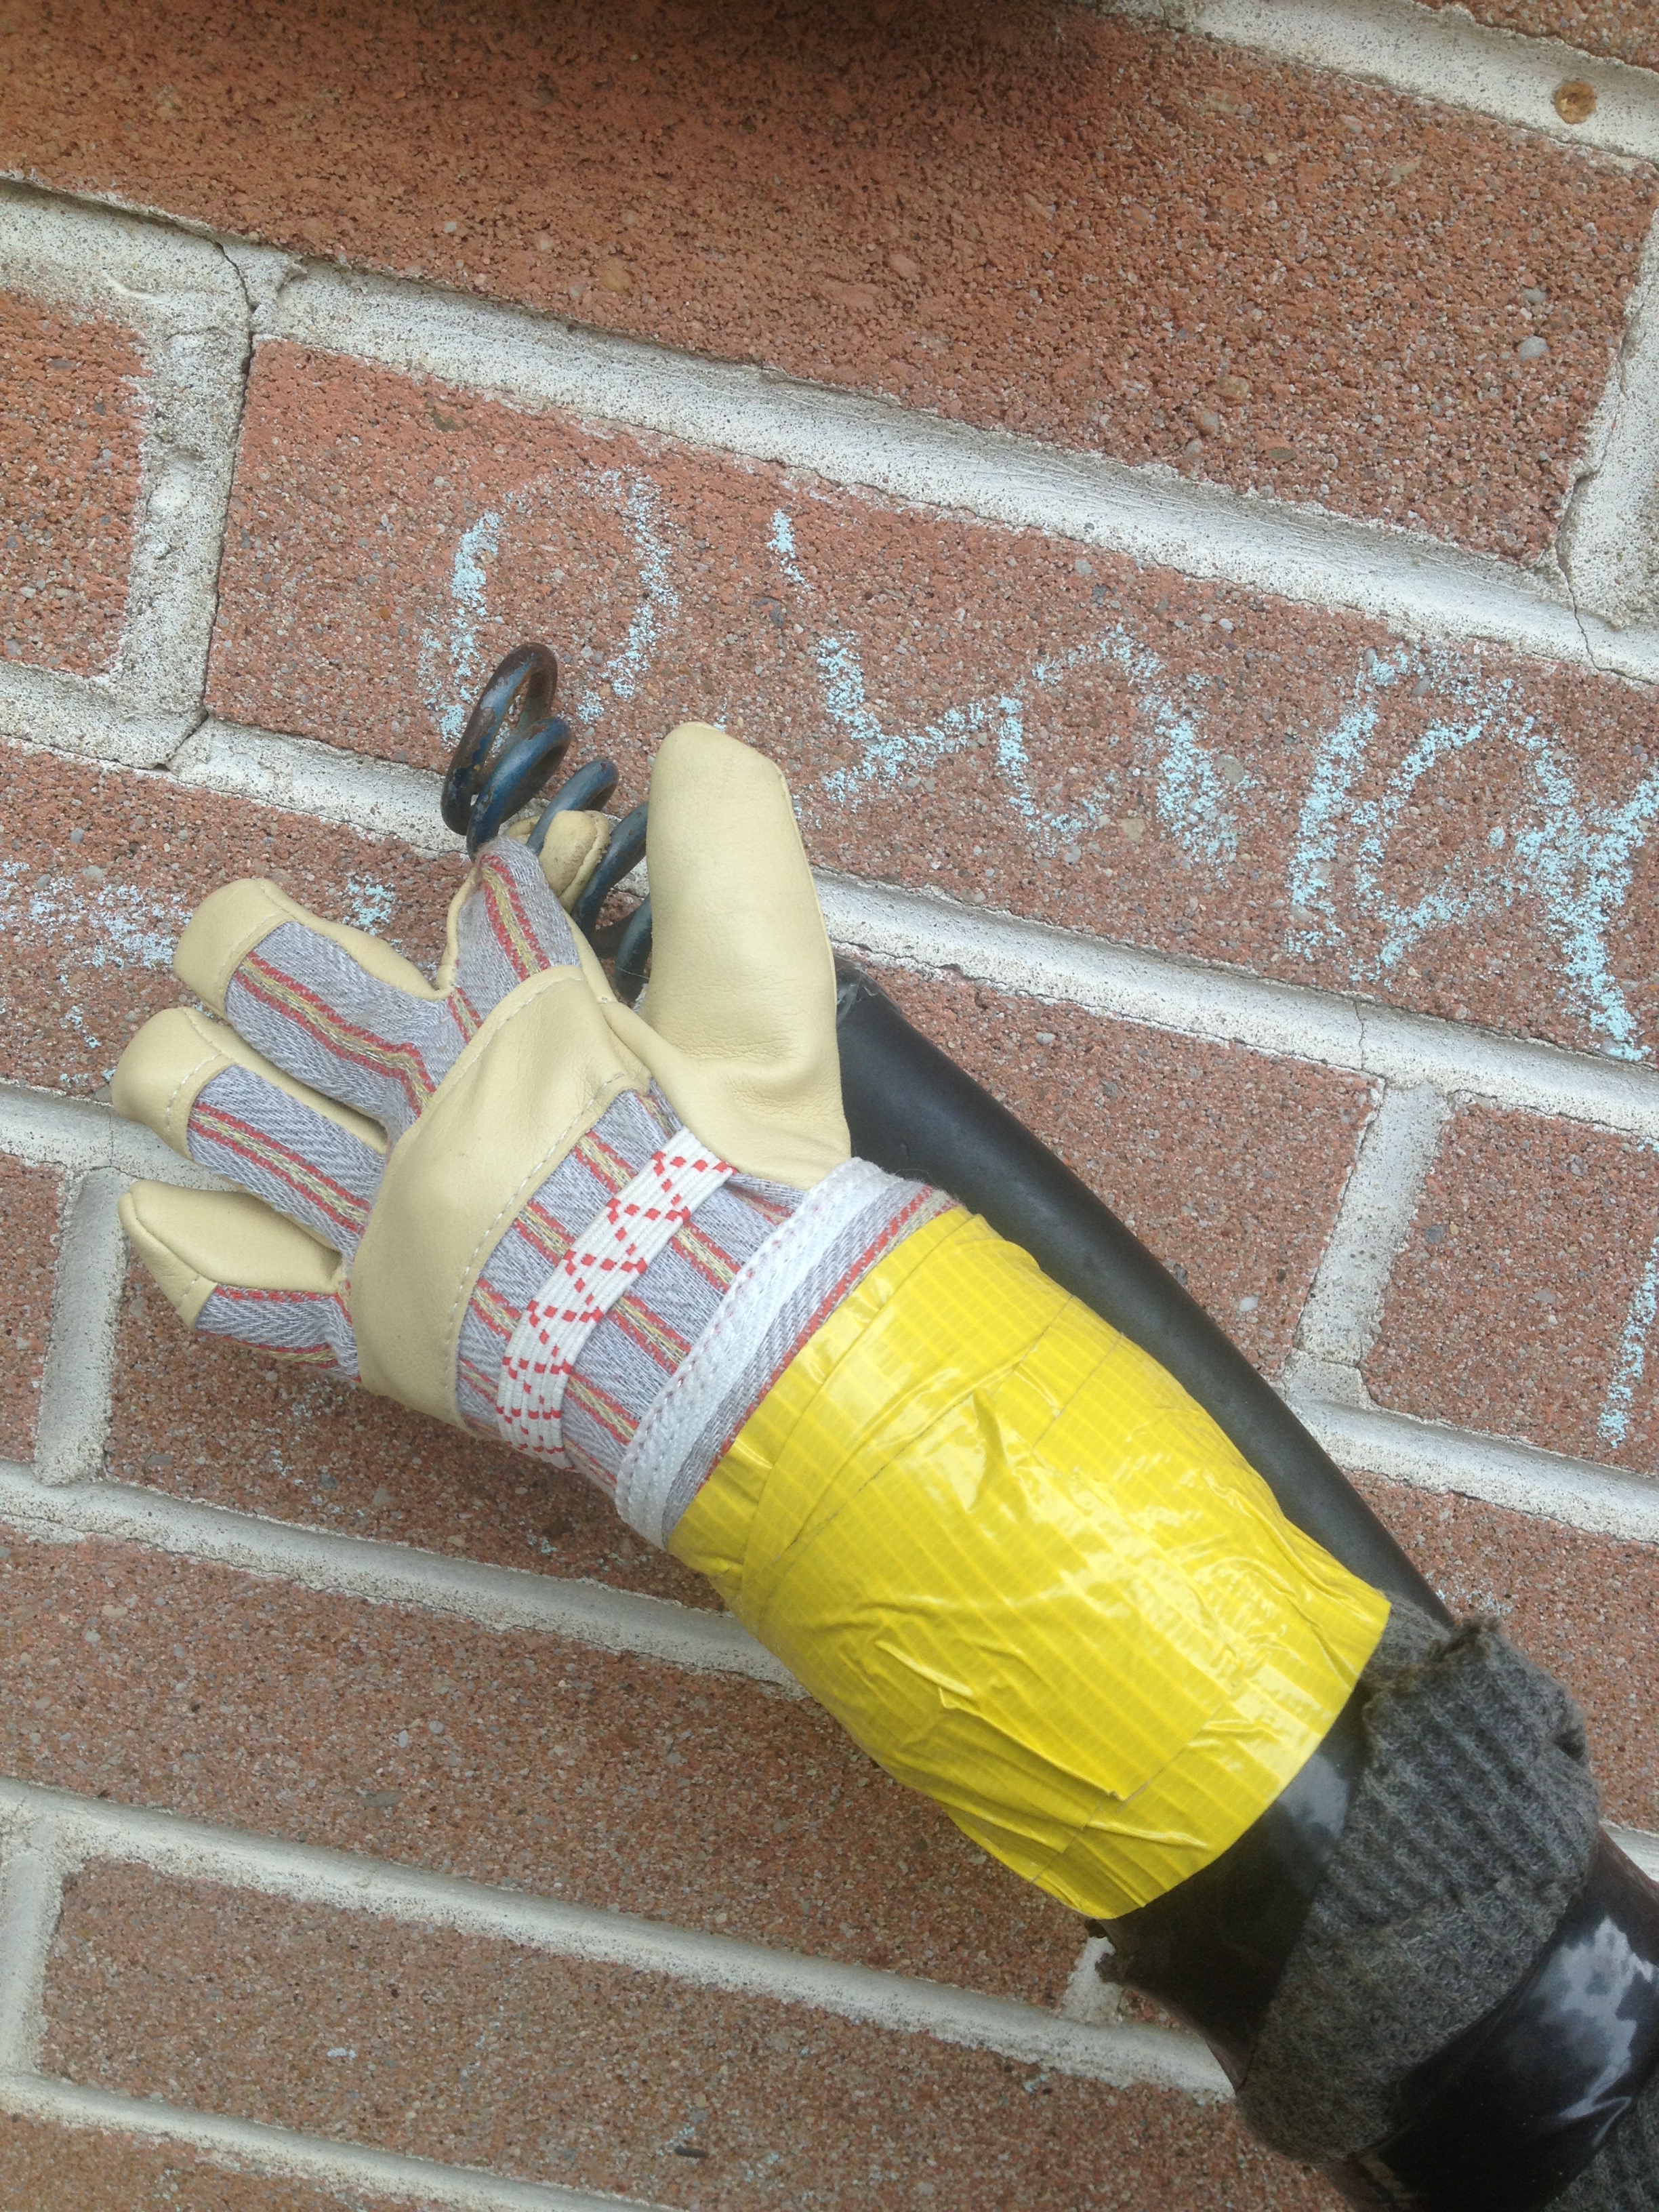
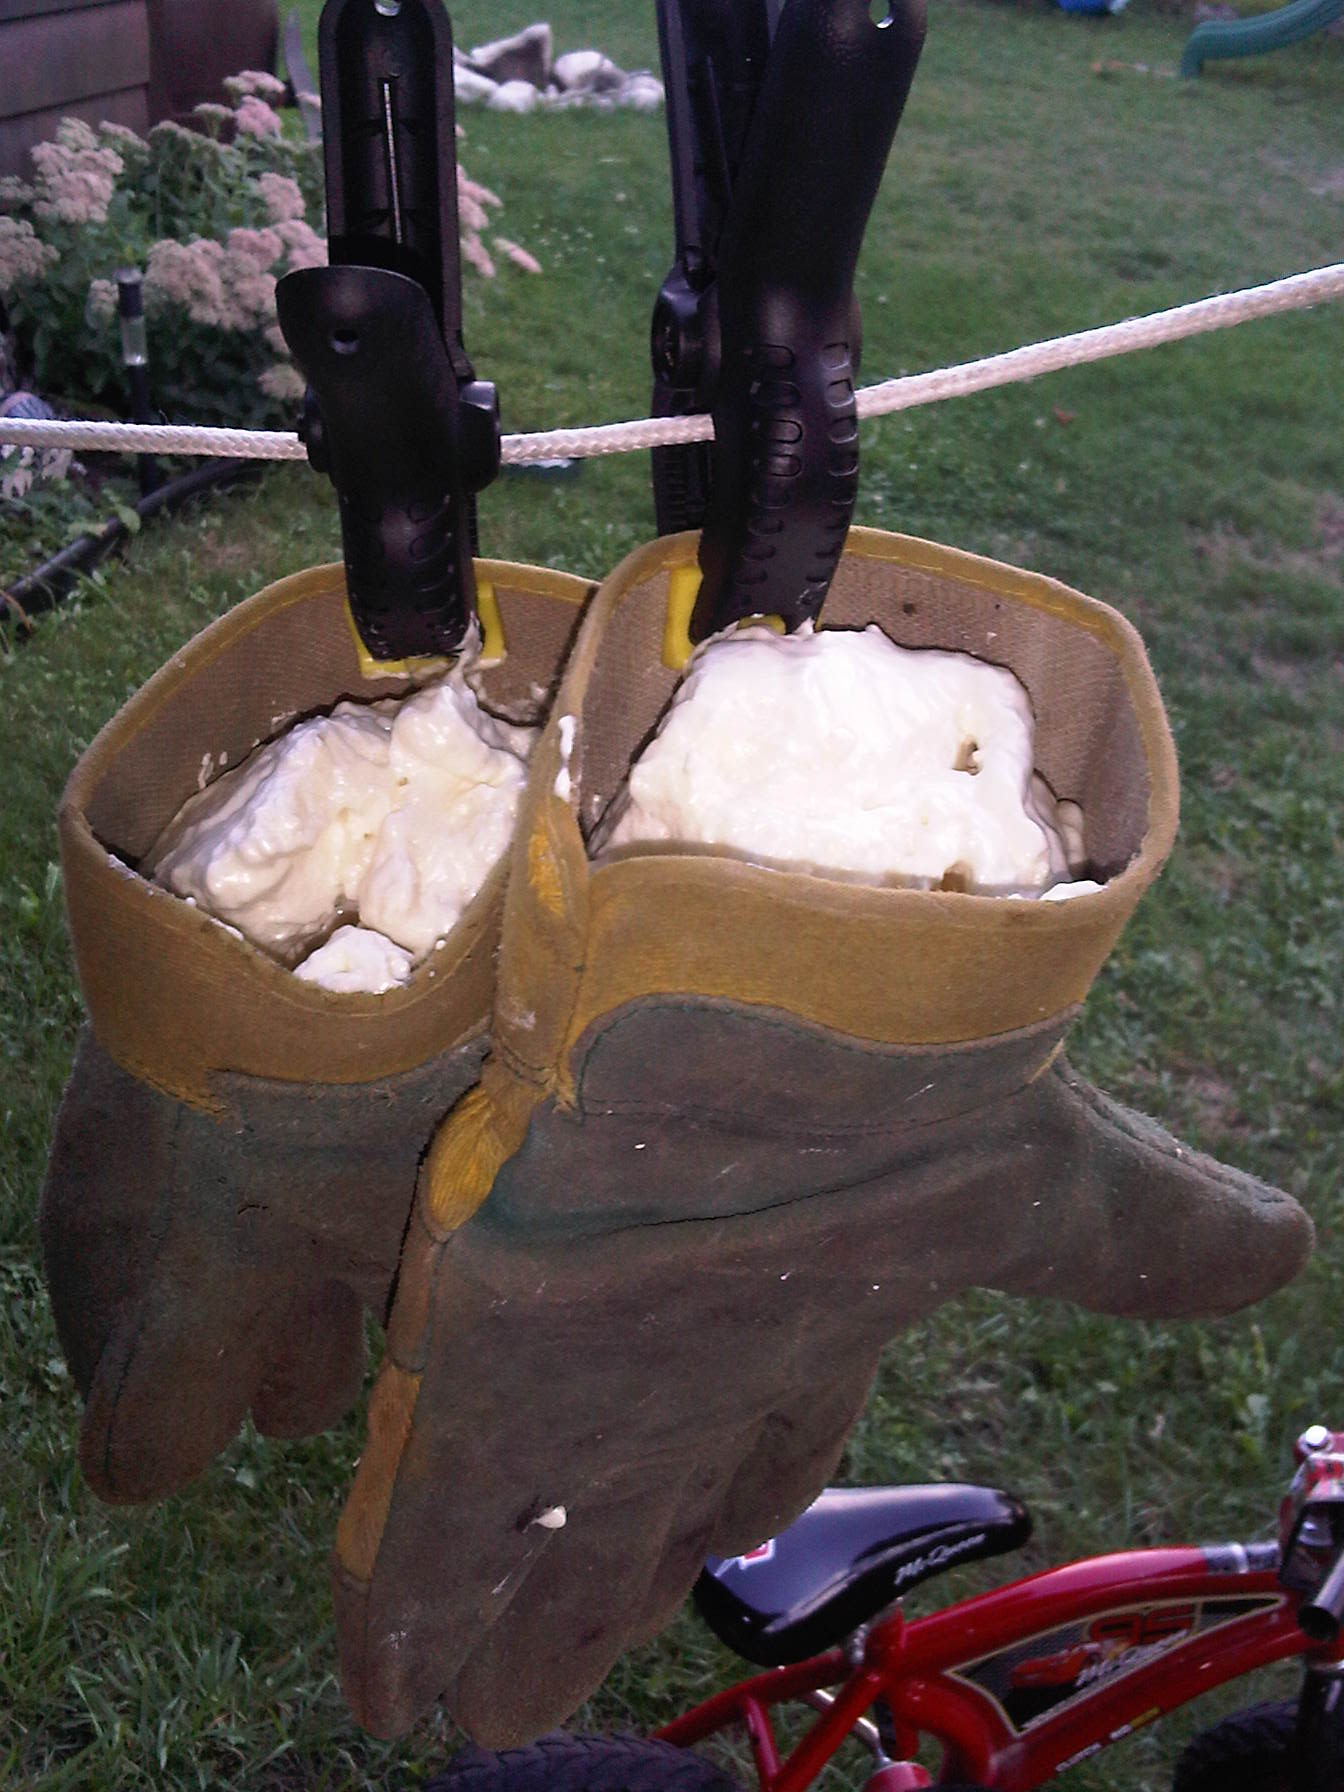
After the cement is dry it was time to build the arm and auger. I use the foam in the glove trick from our previous post. I used a small spring epoxied on the end of a old hose to act as the snake. Once the finger was wrapped up in the snake I put it into the drain pipe and we were ready to drill.

handpipe6
handpipe2

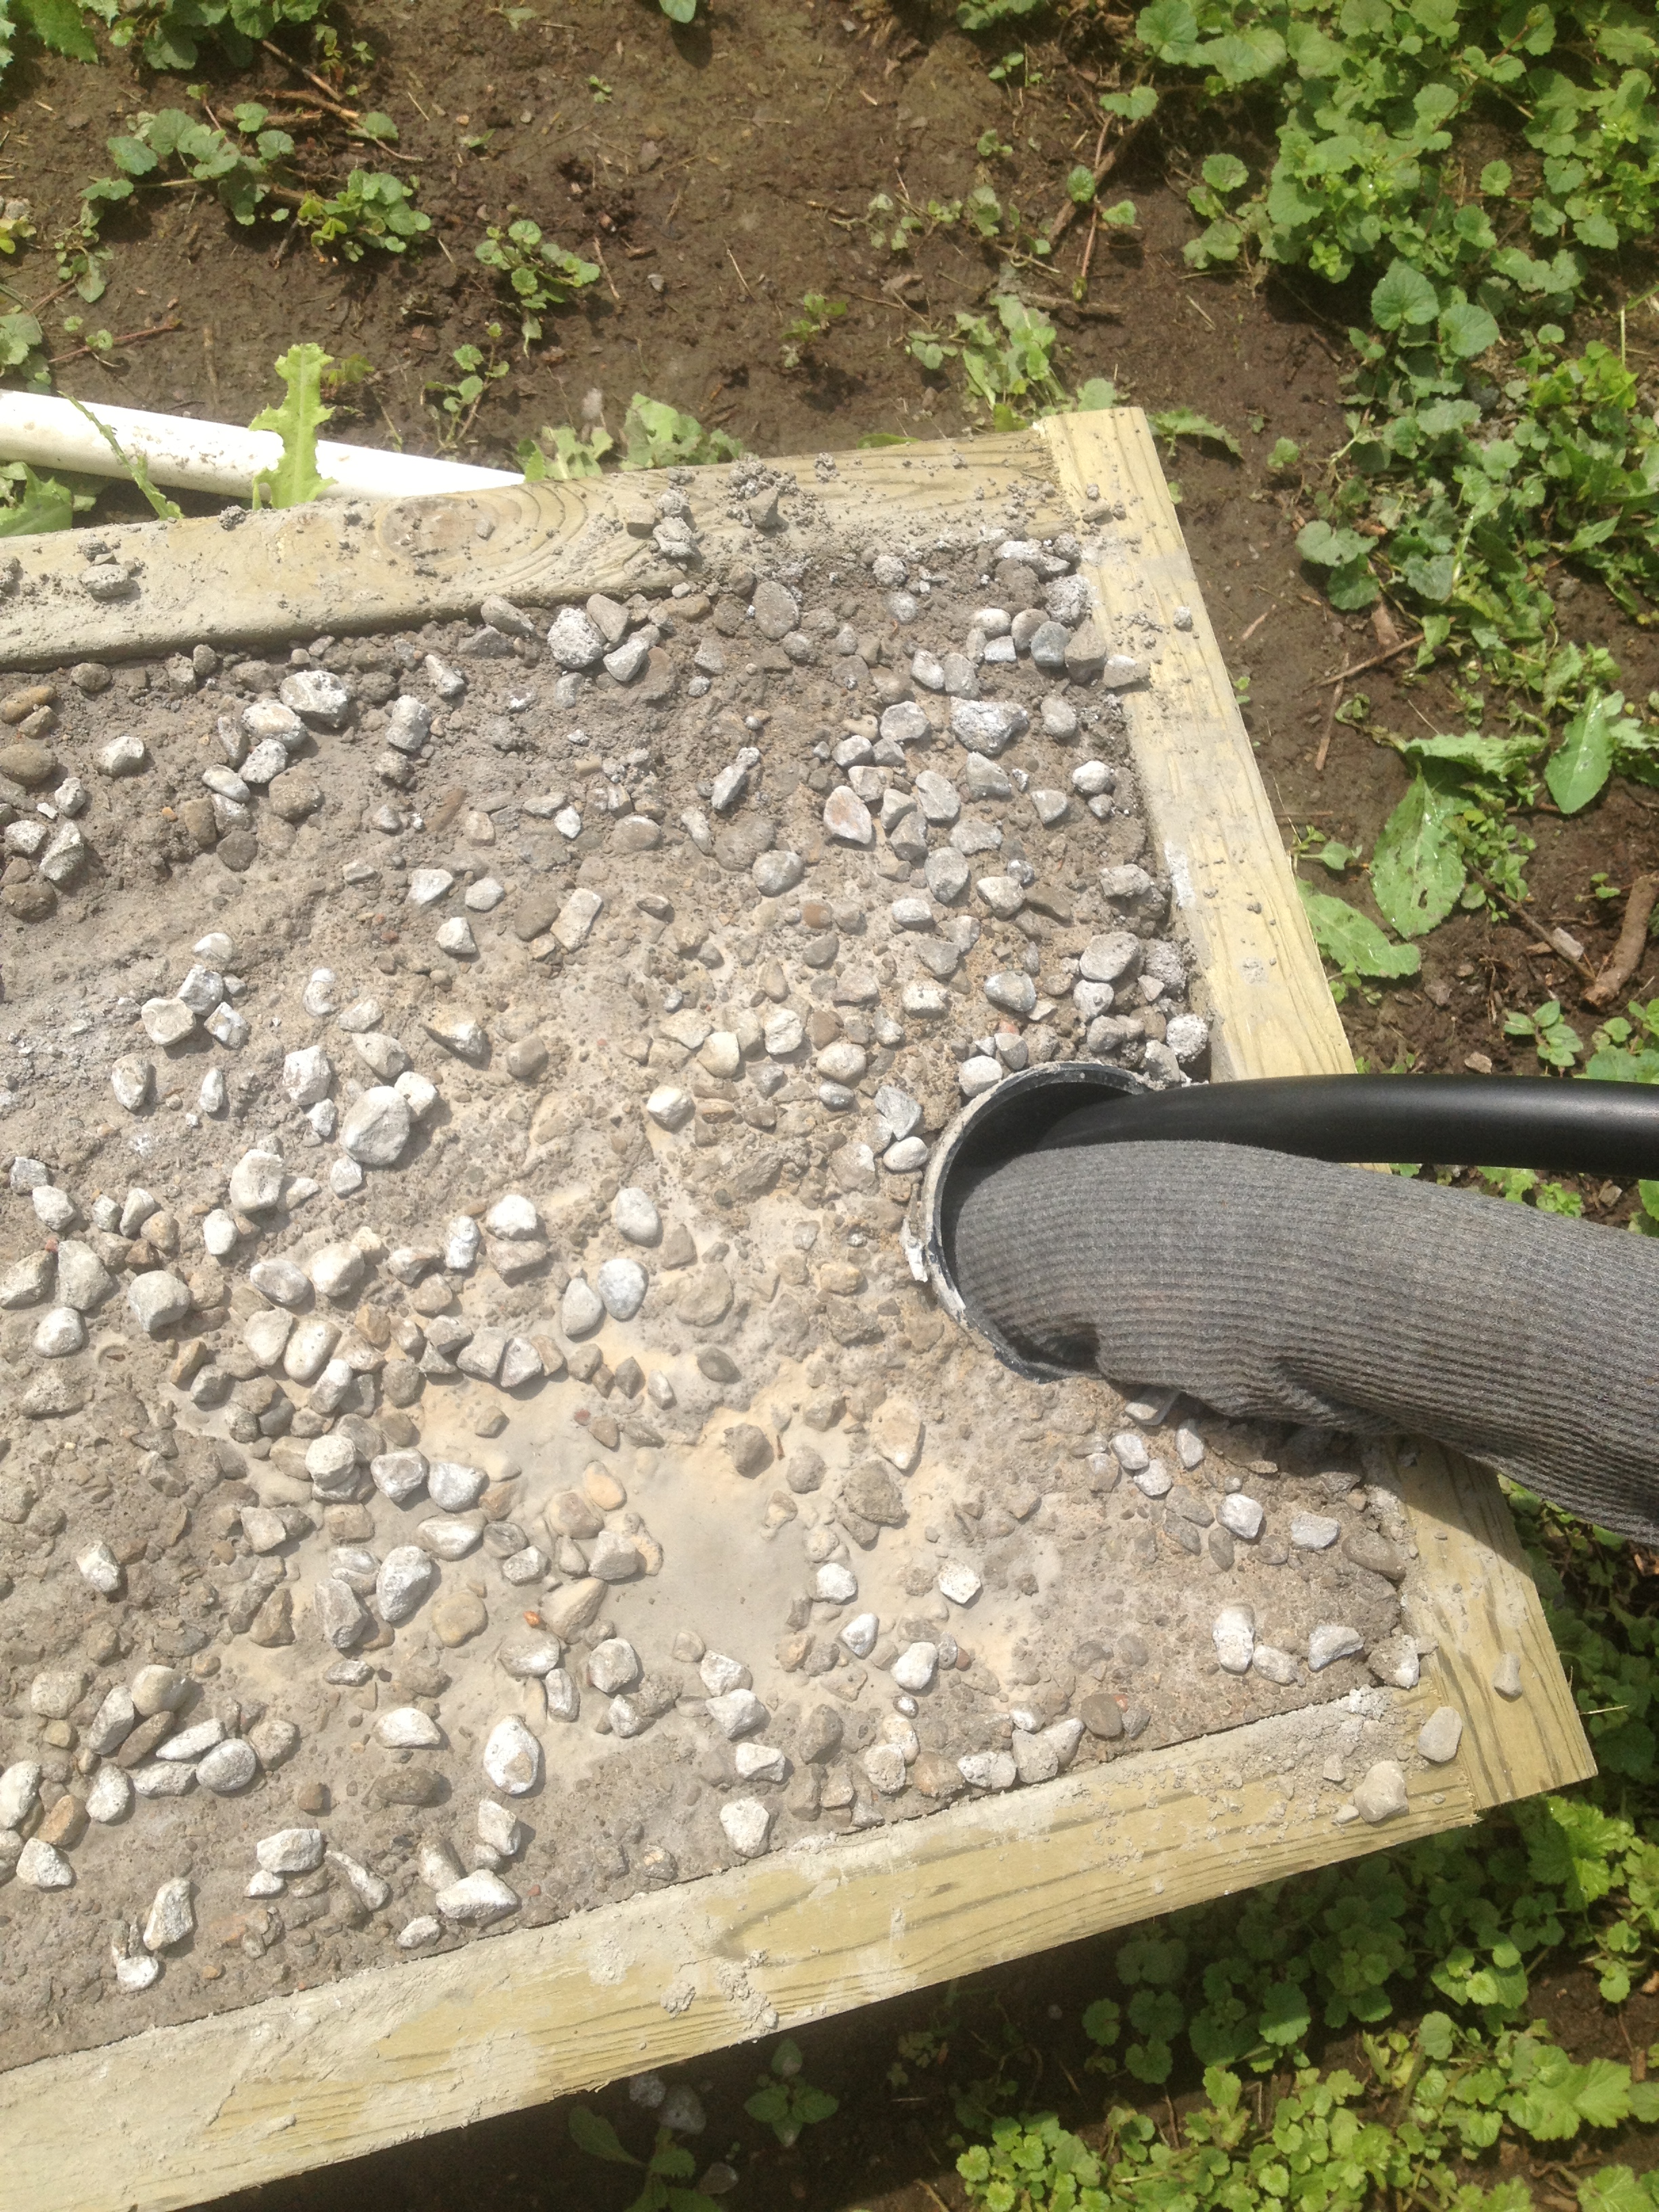
To start the scenario we talked about medical considerations ad we also discussed non evasive solutions we could do (soapy water, etc). Then it was down to the extrication, we used a Partner saw with a diamond blade to cut the concrete and the pipe out.

hand in pipe4

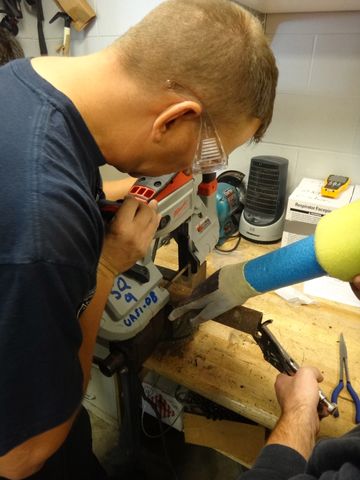
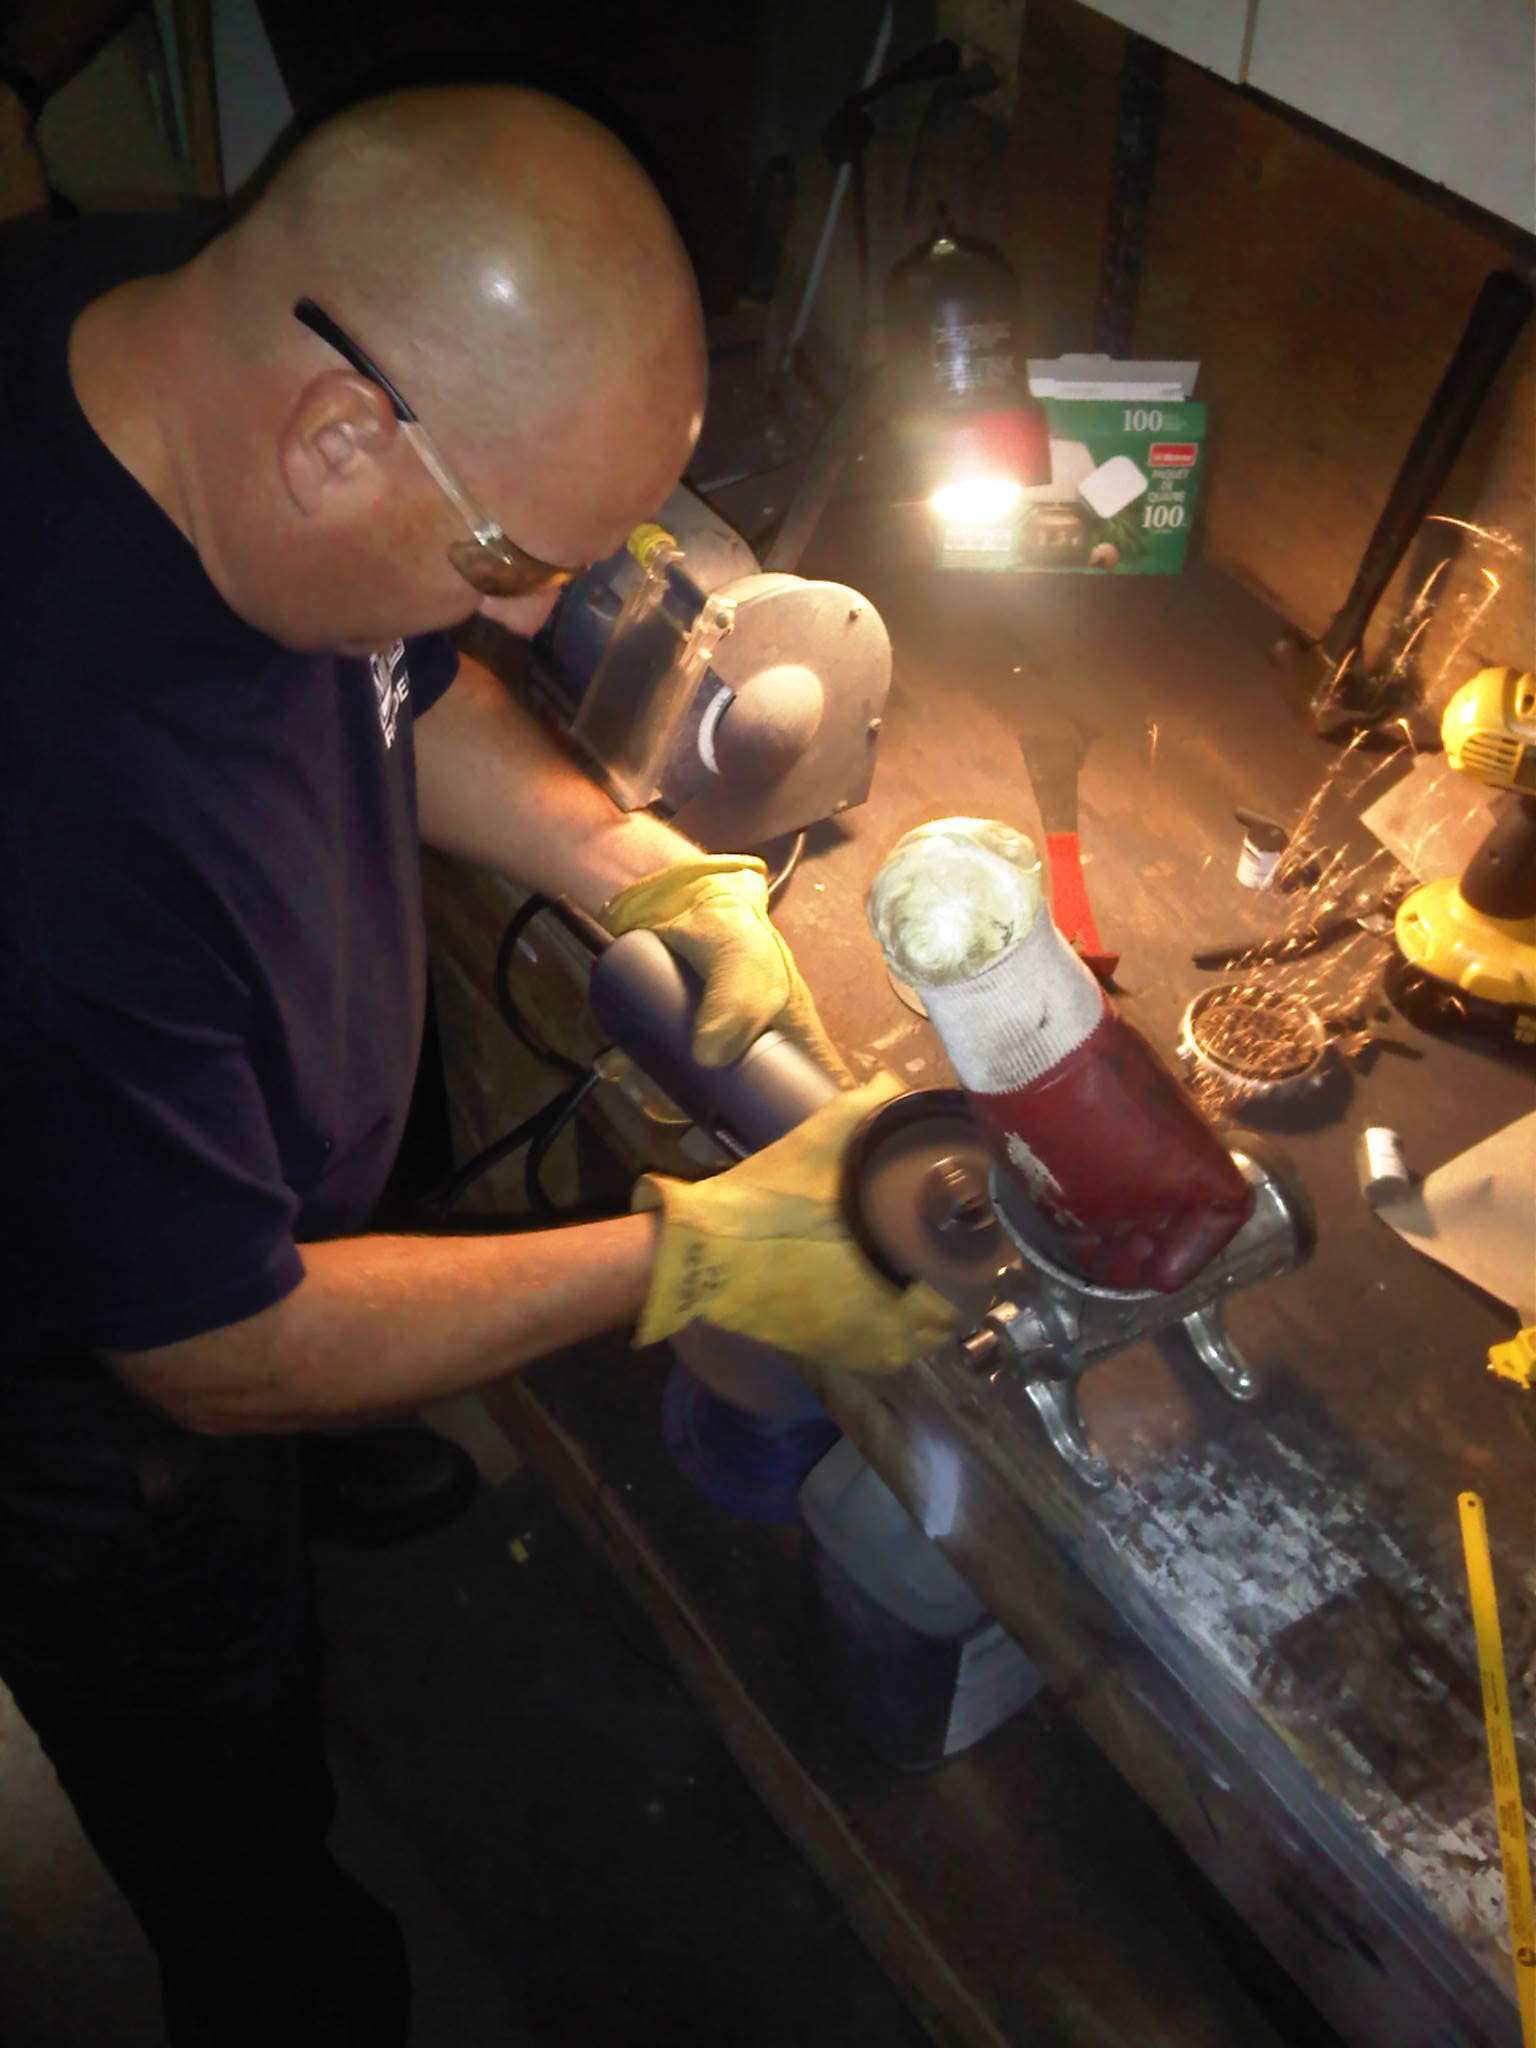
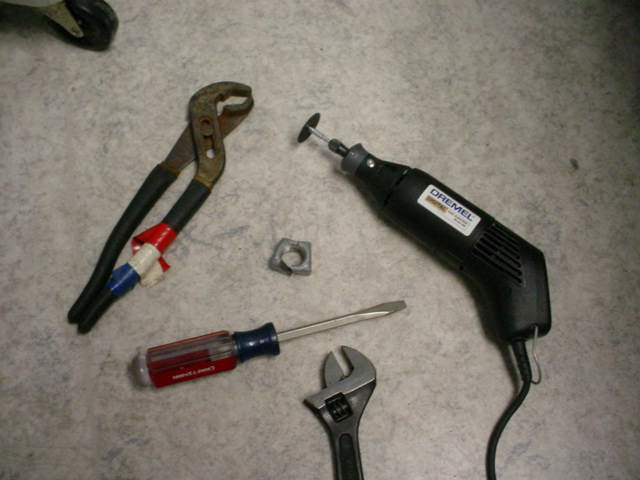
Once we had all the concrete broken off the pipe we used a Dremal tool to dissect the pipe, a multitude of other cutting tools could be used for this operation but we chose to stick with the Dremal tool for this drill.

hand in pipe11
hand in pipe7

We used old hacksaw blades for hard protection from the saw blade. The Dremal worked extremely well at cutting the PVC, another tool that could possibly be used is a PVC Wire Cutter. Once the arm was free from the pipe we needed to cut the metal spring that acted as the snake, again the Dremal was used but far more accurate cuts were needed. A mix of some modified spoons and some old hacksaw blades were used to act as hard protection to protect the patient.

All in all it was a great drill to show several different types of material in one scenario.

Use your imagination and push your training to the next level, you may never go to an extrication like the one we described in this drill but it will help build a tremendous set of skills that you can use in other types of extrication calls.

The Prop Shop- Hand Prop

I think most people would agree that company level fire training is the back bone of our great profession, it is the day to day stuff that you drill on with your crews that has the biggest impact on our efficiency and effectiveness on the fire or rescue ground. So what are we looking for in a company level drill? Well for me it needs to be realistic, hands on, easily repeatable, and it does not require 4 hours of set up time. 

One of the little props I came up with for machine rescue training is a way to make cheap limbs that we could use to get entangled in different pieces of machinery that we could find. Using the typical rescue mannequin hands was usually a little to difficult due to the hand not bending or reacting like a real limb. An easy prop that you can build at the firehouse for under $10 is take an old pair of work gloves or fire gloves and fill them with expanding spray foam (the type you use for insulating around doors and windows). Simply spray the foam into the glove, be sure to get it down into the fingers and only fill the glove up halfway. Hang the gloves up on a clothes line to dry and expand. Once the foam is dry you can use a serrated knife to trim the access foam from the top of the glove.

Image

What you end up with after the foam dries is a firm, flexible, realistic hand that you can use several times for anything from machine rescue to impalement drills. It works great and is extremely cheap to do.

Image

If you are looking to add even more realism to the prop you can also add an arm to the prop. To add the arm take a pool noodle and insert it down into the wet foam and then add some additional foam around the pool noodle, when the foam dries it will have “cemented” the noodle into the glove. Adding the arm works great if you want to entangle it into a lawn mower, snow blower, some rollers, etc.

Image

Image

Image

You can also make a quick and easy leg the exact same way, simply take a shoe or boot and fill the toes with foam and then stick the pool noodle down into the shoe and fill the foam all around it. To make it even more realistic you can add clothes to the leg to make the rescuer have to cut the clothing away from the machine also.

Image

This is a simple, cheap, easy way to make props that will help you out a ton with your in house training.


Water Extrication Pt. 2

In the last water extrication post we talked about extrication tactics for vehicles partially submerged and what type of tactics and tools you would use for extricating a trapped paitent. Now lets look at you game plan if you had a fully submerged car with people trapped, what is your game plan? what tools, equipment, and training do you have for this? Do you have a dive team? If not what are you gonna do?

There are many different answers to these questions and all of them depend on your level of experience and training. What about attempting to haul the car back to shore? When was the last time you did a good heavy rigging drill? How much will your winches hold? what type and grade chain do you have?

What about using your SCBA as a SCUBA tank? The picture below is of the Norwalk Ct. Fire Department using their SCBA’s to rescue two people from a submerged car. Both people were removed from the car, one was resuscitated the other was not. I know several other fire departments have used this method to successfully rescue people from submerged vehicles, so what do you guys think? Is this a valid rescue method? Is this something your department would do? Ever trained in this method? Let’s hear your thoughts!

Image

Water Extrication

In all work that we do as firefighters preparation is one of our biggest keys to success. Training must be extremely realistic and must constantly be pushing us forward in our capabilities and our competence level. Aggressive and realistic training is the answer.

Below are a couple pictures of some auto extrication training that was put on at Bowling Green, Ohio Fire School, these are great photos of pushing your training to the next level. The fist time you cut a car apart in or under the water should not be at 3 o’clock in the morning at a real call!

What types of tools do you have besides the hydraulic cutters and spreaders that you can utilize underwater?

What types of water rescue gear do you have to help facilitate this rescue?

Do you have a mask and snorkel? What else could you use if you don’t have a mask and snorkel?

How would you stabilize this vehicle?

There is a huge difference between what you think will happen in these situations and what you know will happen….. Aggressive training is the key to success.waterex3waterex14waterex11waterex13

Rescue Operations Class May 29 Pensacola Beach

Heavy Rescue Class will start at 0800 in the DeLuna Hall on First Floor of Pensacola Beach Hampton Inn. Less than 10 spots available.

Finger ToolsFinger

Think Basic First and then COMPLEX. K.I.S.S.  KEEP IT SIMPLE STUPID. You still have time to sign up.
Link Below. Class approved for 8 Hours towards Instructor renewal.

https://www.paypal.com/cgi-bin/webscr?cmd=_s-xclick&hosted_button_id=8UZ4HMG76S2FU

Rescue Company Operations Seminar “Special Ops”

Dump Truck call

One day Seminar on Rescue Company Operations on Pensacola Beach, May 29, 2013. 0800-1700 Hours Class will cover all Rescue Company Operations to include: Advanced Vehicle Extrication, Elevator Entrapment, Farm Medic Entrapment,Grain Silo Recues, Trash Truck Entrapment, Machinery Extrication, Human trapped in hydraulic equipment, kids and vending machines/toys & bicycles, RIT on the Fire Ground & other incidents that require RIT operations. The Instructor has been involved in and responded to all of these type incidents and will cover based on extensive training and incident tested results. This beyond your normal Extrication Training Class. Class Size is limited. This is the First of this type class in the region and has been approved for 8 Hours of Instructor renewal ceus.

Pictures & Video of real incidents will be utilized in this fast passed class.

Main Speaker

Curt Isakson
24 Year Veteran
Curt has an extensive background in Rescue/Special Operations to include Chief of Special Operations for 7 years. Curt took his first extrication class in the summer of 1988 and has been intrigued with extrication & rescue operations ever since. Curt was a member of the Technical Rescue team during his 9 years with the Pensacola FD. He was assigned as the Lieutenant on a Heavy Rescue for 5 years and was assigned as a firefighter to the same Rescue before promotion to Lt. He also started his career in the volunteer ranks assigned to a Bread Truck convertited into a Heavy Rescue and contributed to many modifications and additions.

To Register click on link: https://www.paypal.com/cgi-bin/webscr?cmd=_s-xclick&hosted_button_id=8UZ4HMG76S2FU

Elevator Operations

When do you take the Elevator? When do you take the stairs? Can you operate in Firefighter Mode? Do you have a universal elevator key on all companies? Do you carry the red phone? What should you do before getting in elevator? What tools do you carry up? What floor do you get off on?

Rapid Intervention/Firefighter Rescue Teams

When do you assign a RIT/FAST?

The Fire Ground is so dynamic and the functions that must be completed to save lives and property, make it a serious challenge on when to assign certain task, based on available firefighters/companies. The two-in-two out is not reliable when a real world event happens. Could those two firefighters possibly be more efficient doing some other fire ground functions to prevent a mishap?  Do you know what IRIT stands for and have you really read up on what two out really is? The two out is a temporary CHECK in the BOX and Check in the BOX it is. But, so many Chiefs’ are more concerned with checking the box, that THEY fail to understand if the check is really efficient and has been fire ground tested. Like the whole changing channels during a MAYDAY. Hey Brother, standby, while we have all your other brothers that are close by, change to a different channel. We have got to stop coming up with Tactical Theories and start talking with experienced veterans “ones that respond and actually have been there” on what will really work and not what sounds good in a conference room on Monday morning.

When should we assign RIT during the initial attack?  How many should be assigned? Where should they stage?  WHAT TOOLS SHOULD THEY HAVE?  What should they be allowed to do while standing by? Can they be put to work? What channel should they operate on? When do we terminate the RIT assignment? What type of training should they have? Does YOUR department only assign firefighters/companies to RIT that have been properly trained? Does your department just assign for the check in the box? What’s more important the first line and getting the building ventilated properly or having a RIT before any other tactics are performed?

Does your FD always assign FOUR?  What is the most important thing the RIT does for a down firefighter inside?


DO you assign RIT on all FIRES?

What are your capabilities with air bags?

Photo By: JJ Cassetta

How much will your bags lift? How do you calculate? How many bags are you WILLING to STACK?? What do you have to complement your air bags? How does this ditch complicate things? How high can your box crib be, using air bags?